Oatmeal Protein Balls
Peanut Butter No-Bake Energy Bites
(So Easy!)
4 ingredients · No oven · Ready in 20 minutes · Grab-and-go perfection for the whole family
You know those days when you need something quick, satisfying, and actually good for you? These are those days’ answer. Four pantry staples. No oven. No fuss. Just roll, chill, and you’re done.
These energy bites have become a weekly staple in thousands of kitchens — and once you make your first batch, you’ll understand why. They’re chewy, chocolatey, and naturally sweet, with a hit of protein that keeps you full between meals.
Whether you’re meal prepping for the week, packing snacks for kids, or need a post-workout bite that doesn’t taste like cardboard — this recipe has you covered. Let’s make them.
📌 As seen on Pinterest
Why Everyone Makes These on Repeat
Absolutely No Baking
No oven, no stove, no heat. Just mix, roll, and chill. You can make a full batch in under 20 minutes, start to finish.
4 Simple Ingredients
Oats, peanut butter, honey, and chocolate chips. That’s genuinely it. You probably have all four in your kitchen right now.
Actually Filling
Unlike most snacks, these keep you full. Protein from peanut butter + complex carbs from oats = real, lasting energy.
Kids Love Them Too
No strange ingredients, no weird texture. Just sweet, chewy bites that children reach for instead of candy. A parent win.
Freezer-Friendly
Make a double batch and freeze half. They thaw in minutes, so you always have a healthy snack ready — even on your busiest days.
Endlessly Customisable
Swap in different nut butters, add protein powder, swap chocolate for dried fruit. The base recipe is just a starting point.
Answer honestly and we’ll point you to the exact recipe for your taste, goals, and lifestyle — no guessing required.
How Many Balls Do You Need?
How To Make Energy Balls — Step by Step
This is genuinely one of the simplest recipes on this site. If you can stir, you can make these.
- 1
Mix Everything in One Bowl
Add your rolled oats, peanut butter, honey, and chocolate chips to a large mixing bowl. If using vanilla extract or flaxseed, add those too. Stir with a spatula or wooden spoon until everything is fully combined and no dry oats remain.
💡 The mixture should feel sticky but hold together when pressed. If it’s crumbly, add 1 more tbsp of honey or peanut butter. - 2
Chill the Mixture First
Cover the bowl with cling film and refrigerate for 30 minutes. Don’t skip this step! Chilling firms the mixture so it’s much easier to roll into neat balls — warm mixture sticks to your hands and makes uneven shapes.
💡 You can leave it overnight — chilled mixture rolls even more easily the next day. - 3
Roll Into Balls
Scoop out roughly 1 heaped tablespoon of mixture per ball. Roll between your palms using firm, even pressure until smooth and round. Place each ball on a baking sheet lined with parchment paper.
💡 Lightly wet your hands with cold water first — the mixture won’t stick and you’ll get perfectly smooth balls. - 4
Chill Again Until Firm
Place the tray in the fridge for at least 30 minutes before serving. This second chill sets the shape and gives the balls that satisfying bite-through texture rather than a soft, mushy centre.
💡 For even faster setting, pop them in the freezer for 10–15 minutes instead. - 5
Transfer & Store
Move the chilled balls to an airtight container, layering with parchment paper to prevent sticking. They’re ready to grab and go straight from the fridge — no unwrapping, no prep, just pick one up and eat.
Switch It Up — 5 Ways to Make Them
The base recipe is magic. But once you’ve made it once, these swaps take it somewhere new every time.
Classic Peanut Butter Oat Balls
The original. Rolled oats · peanut butter · honey · mini chocolate chips. This is the version that got 2.32k saves on Pinterest — and for very good reason. It’s the perfect balance of sweet, chewy, and satisfying.
Best for: First timers, kids’ lunchboxes, everyday snacking.
✅ Follow the base recipe exactly as written aboveHigh-Protein Power Balls
Add 2–3 tablespoons of your favourite protein powder (vanilla or chocolate work best) to the base recipe. You may need an extra tablespoon of honey to compensate for the added dryness from the powder.
- Add 2 tbsp vanilla protein powder to base recipe
- Add 1 tbsp extra honey if mixture feels too dry
- Add 2 tbsp flaxseed or chia seeds for extra fibre
- Boost protein further with 2 tbsp hemp seeds
Double Chocolate Energy Balls
For when you need a dessert that’s still healthy enough to feel good about. Swap ¼ cup of oats for cocoa powder, and use dark chocolate chips instead of milk chocolate.
- Replace ¼ cup oats → ¼ cup unsweetened cocoa powder
- Use dark chocolate chips (70% cacao or higher)
- Add a pinch of sea salt on top of each ball before chilling
- Optional: 1 tsp espresso powder deepens the chocolate flavour dramatically
Fully Vegan Energy Balls
The base recipe is almost vegan already. Just make two simple swaps and it’s completely plant-based without sacrificing any taste or texture.
- Swap honey → pure maple syrup (same quantity)
- Use dairy-free chocolate chips (most dark chips are already vegan)
- Use natural peanut butter with no added milk ingredients
- Add 2 tbsp desiccated coconut for extra texture and natural sweetness
Almond Joy Balls
Swap peanut butter for almond butter, replace chocolate chips with shredded coconut, and add a whole almond pressed into the centre of each ball. Inspired by the classic candy bar — but made with real ingredients.
- Swap peanut butter → almond butter (same quantity)
- Replace chocolate chips → ¼ cup shredded coconut + ¼ cup dark choc chips
- Press one whole roasted almond into the top of each ball
- Optional: ½ tsp almond extract intensifies the flavour beautifully
Tips for the Perfect Energy Balls Every Time
🥄 Measure Your Peanut Butter Correctly
Too much peanut butter = greasy balls that won’t hold shape. Use a proper measuring cup and level it off. Natural peanut butter works best — stir it well before measuring.
🌡️ Chill Before Rolling — Always
Warm mixture sticks to your hands and makes lopsided balls. 30 minutes in the fridge transforms the texture completely. This step makes rolling fast and easy.
💧 Wet Hands Trick
Before rolling, dampen your palms with cold water. The mixture won’t stick, you’ll get smoother balls, and the whole process is about three times less frustrating.
🍯 Honey vs Maple Syrup
Honey gives a slightly denser, stickier result. Maple syrup makes them a little lighter and gives a more subtle sweetness. Both work — it’s personal preference.
📏 Consistent Size = Even Chilling
Use a cookie scoop or tablespoon measure to portion each ball. Consistent size means they all chill at the same rate — no soft ones mixed with firm ones.
⚠️ Don’t Use Instant Oats
Instant oats absorb too much liquid and create a mushy texture. Always use old-fashioned rolled oats — they give the chewy, hearty texture that makes these so satisfying.
What’s In Each Ball?
Based on the base recipe making 20 balls. Estimates vary with ingredient brands and add-ins.
How to Store Energy Balls
Days in Fridge
Store in an airtight container. Layer with parchment to prevent sticking.
Months in Freezer
Freeze on a tray first, then transfer to a zip-lock bag. Thaw in 10 minutes.
At Room Temp
Fine at room temperature for a couple of hours — great for packed lunches.
Double Batch
Always worth making double — freeze half and you have snacks ready for weeks.
Questions About Energy Balls
👩🍳Protein Energy Snack Prep Essentials💪

- 24 g High-Quality Whey Protein per Scoop – 100% of…
- 5.5 g Naturally-Occurring BCAAs + 11g of naturally…
- Low Sugar, Low Carb, Low Fat — Ideal for Lean Musc…

- NUTRIENT POWER: This omega powerhouse is full of o…
- SIMPLY ORGANIC: Our Organic Chia Seeds are gluten-…
- WITH OMEGA-3 & MORE: Chia seeds are loaded with 53…

- Pure almond butter made with 100% almonds
- Kosher certified and Non-GMO verified
- Creamy texture perfect for spreading
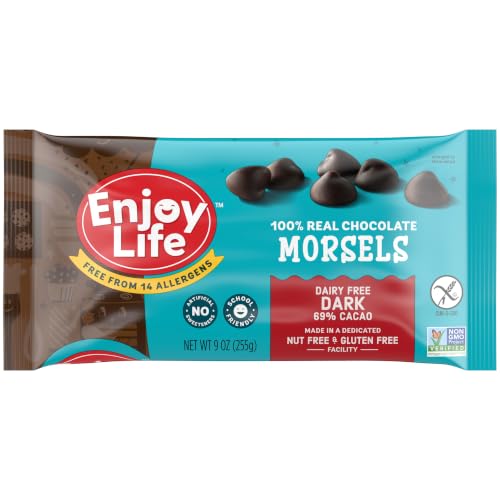
- One 9 oz bag of Enjoy Life Dark Chocolate Morsels
- Vegan chocolate chips made in a dedicated nut-free…
- Larger, indulgent dark chocolate chips are perfect…
📌Related Read:
9 Ninja Creami Recipes with Greek Yogurt for High Protein Ice Cream
15 Protein Dessert Recipes for Guilt-Free Sweet Cravings
12 Gym Food Protein Aesthetic Meals for High Protein Meal Prep