
Chicken Paitan · 4 Hours · No Pork
Creamy Ramen Broth Recipe (Chicken Paitan — the Tonkotsu-Style Bowl, No Pork)
An opaque, milky, lip-coating broth built from chicken bones and a hard rolling boil — plus the tare and aroma oil that most home recipes leave out.
- 4–6 hour boil
- Emulsified, not creamed
- No pork, no alcohol
- Freezes for months
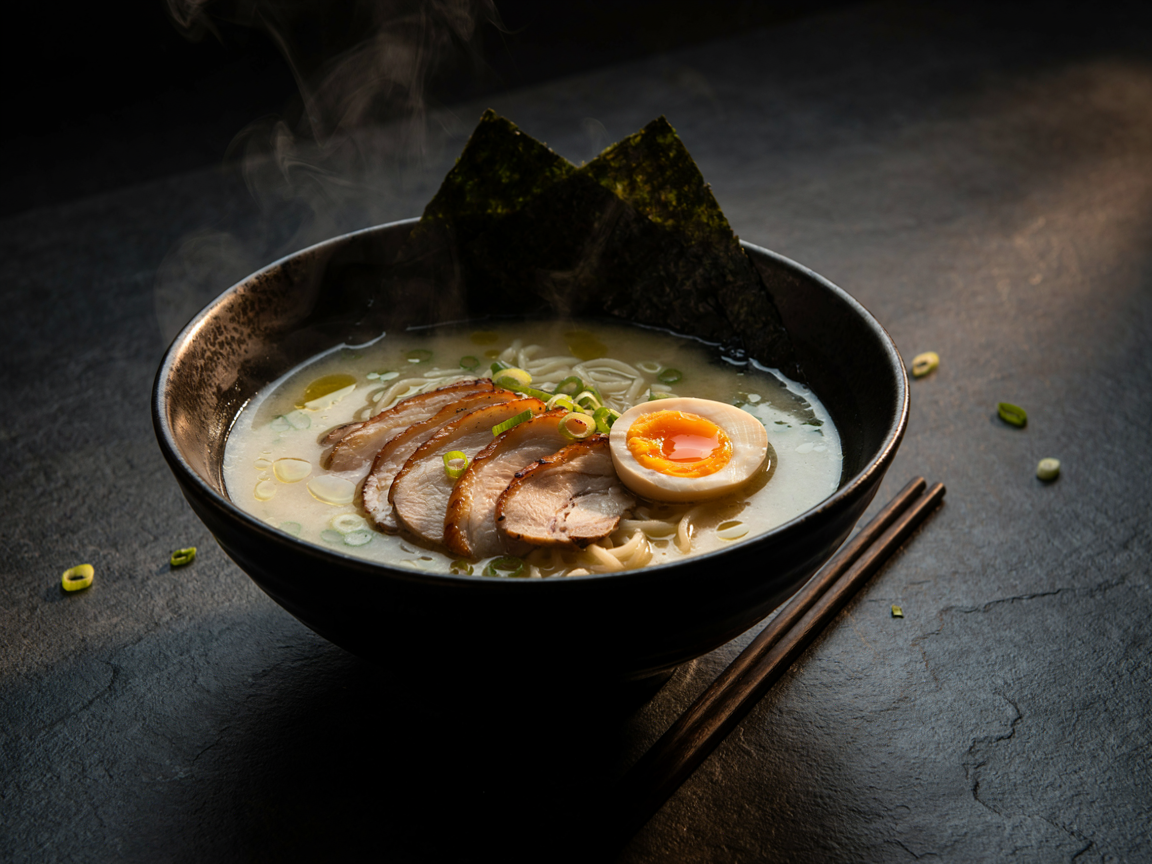
That opacity is fat and collagen forced into suspension. There is no cream anywhere in this bowl.
A creamy ramen broth recipe lives or dies on one instruction, and almost every version online gets it wrong by being too polite about it. You do not simmer this broth. You boil it, hard and without mercy, for four hours or more, and that violence is the entire mechanism — it is what smashes fat and collagen into the water until the whole pot turns opaque white.
One honest note before the recipe, because the word matters. Tonkotsu means pork bone, so a chicken broth is not tonkotsu no matter how similar it looks. What this makes is tori paitan — a traditional Japanese broth in its own right, built the same way and producing the same milky, lip-coating bowl. Lighter, slightly sweeter, and no pork anywhere.
Save the pin — this is a weekend project worth planning for.
Why This Creamy Ramen Broth Recipe Turns White
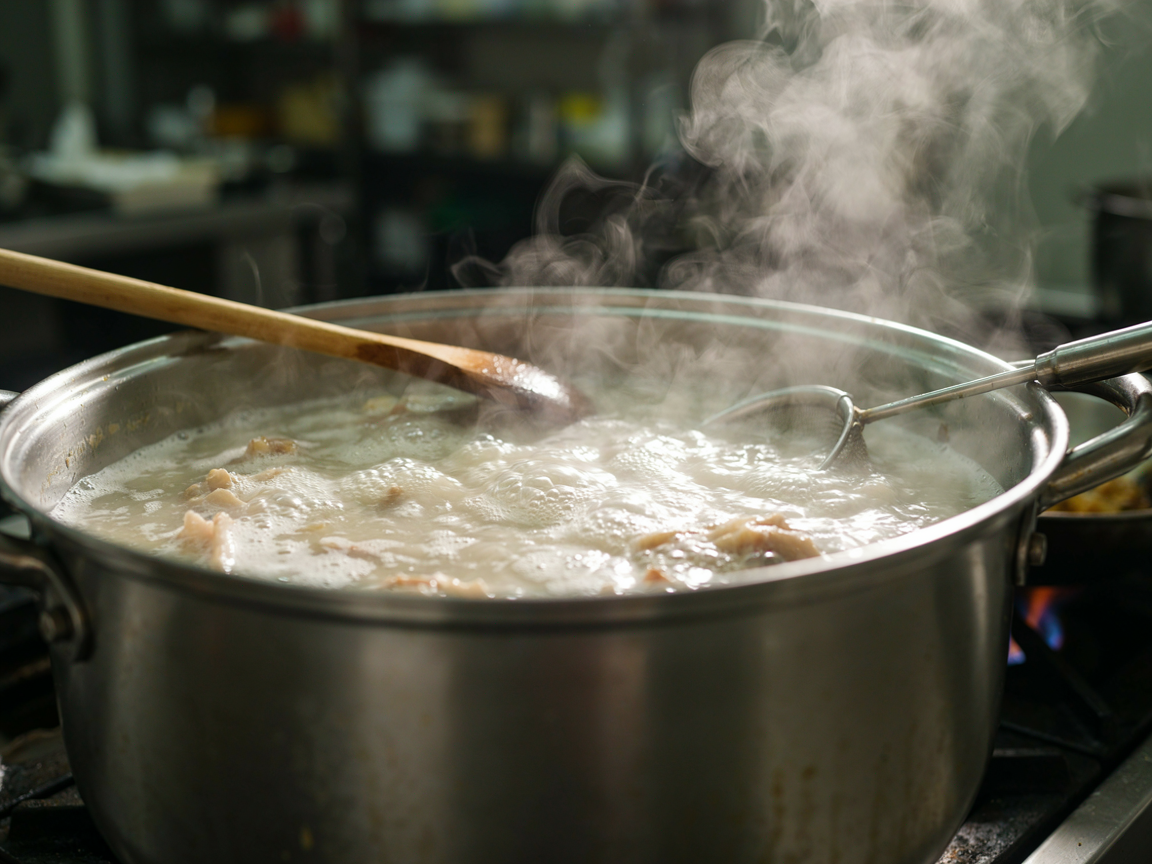
This is what hour three should look like. If yours is still see-through, the heat is too low.
There is no cream, no milk and no flour in a paitan broth. The colour is an emulsion — microscopic droplets of fat suspended evenly through water so that light scatters instead of passing through. Milk looks white for exactly the same reason.
Collagen becomes gelatin
Hours of heat convert the connective tissue in bones, skin and feet into gelatin, which dissolves into the water and acts as the emulsifier holding everything together.
Fat gets smashed apart
A rolling boil shears the rendered fat into droplets small enough to stay suspended. A gentle simmer lets those droplets merge and float to the top instead.
Bone marrow and minerals
Marrow and fine bone particles enrich the liquid further and add to the opacity. This is why bones get broken or split rather than left whole.
Time does the rest
Four hours minimum. The broth passes visibly through clear, then cloudy, then genuinely milky, and you can watch it happen across the afternoon.
This is the opposite of every stock rule you know. Clear stock wants a bare simmer and constant skimming. Paitan wants a violent boil and the fat left exactly where it is. If you catch yourself skimming, stop — you are removing the thing that makes it creamy.
Paitan, Tonkotsu, Shio and Shoyu: What’s the Difference
These words describe two different things, which is why ramen menus confuse people. Paitan and tonkotsu describe the broth. Shio, shoyu and miso describe the seasoning. A single pot of broth can become any of the three depending on which tare you put in the bowl.
| Term | What it means | In this recipe |
|---|---|---|
| TermTonkotsu | What it meansPork bone broth, boiled hard until opaque and creamy | In this recipeNot used — this is the chicken equivalent |
| TermTori paitan | What it meansChicken bone broth, same method, same opaque result | In this recipeThis is what you are making |
| TermChintan | What it meansA clear broth, gently simmered and skimmed | In this recipeThe opposite approach entirely |
| TermShio / Shoyu / Miso | What it meansSalt, soy or miso seasoning — the tare, not the broth | In this recipeShoyu tare, made without sake or mirin |
So a bowl of “shoyu ramen” tells you how it was seasoned and nothing about the broth underneath. And tonkotsu shoyu, the combination most people picture, is simply pork bone broth seasoned with soy — which is exactly what this recipe produces, with chicken in place of the pork.
The Broth
Creamy Chicken Paitan Ramen Broth
Chicken bones and feet blanched, then boiled hard for four hours until the fat and collagen emulsify into an opaque white broth.
How many bowls?
Ingredients
- 2 lb (900g)3 lb (1.4kg)4 lb (1.8kg)6 lb (2.7kg) chicken backs, carcasses and wings
- 10 oz (280g)1 lb (450g)1⅓ lb (600g)2 lb (900g) chicken feet — the single biggest upgrade to body
- 3½ quarts5 quarts7 quarts10 quarts cold water, plus boiling water to top up
- 1 small1 medium1 large2 medium yellow onion, halved
- ½112 head of garlic, halved across the middle
- 1-inch piece2-inch piece3-inch piece4-inch piece fresh ginger, sliced thick
- 1122 leek top, or a handful of spring onion greens
Instructions
Blanch the bones first
Cover the chicken bones and feet with cold water, bring to a boil and let it go hard for 10 minutes. Drain everything into the sink, then rinse each piece under cold running water and scrub the pot clean. This removes the scum that would otherwise turn the finished broth grey instead of white.
Cover with fresh water and boil hard
Return the clean bones to the clean pot, cover with cold water by about two inches, and bring it to a rolling boil. This is the single most important instruction in the recipe: a gentle simmer gives a clear broth, and only a hard, constant, violent boil emulsifies the fat and collagen into an opaque white one.
Keep it boiling for four hours
Maintain that rolling boil for at least 4 hours, and up to 6 if you have the time. Top up with boiling water whenever the level drops below the bones. The broth will go from clear, to cloudy, to properly milky — if it is still translucent at hour two, your heat is too low.
Aromatics in for the final hour
Add the halved onion, the head of garlic, the ginger and the leek top for the last hour only. Any longer and the alliums turn bitter and dominate the broth; any less and you will not taste them at all.
Strain and press
Strain through a colander into a second pot, then press the solids firmly with the back of a ladle to force through every bit of gelatin and emulsified fat. Do not skim the fat off — that fat is suspended in the broth and it is what makes it creamy.
Check the body
Chill a spoonful for two minutes. It should thicken noticeably and coat the spoon. If it feels thin, return the strained broth to the heat and boil hard, uncovered, until it reduces by a quarter.
Season in the bowl, never the pot
Leave the broth completely unsalted. Ramen is seasoned per bowl with tare — about 2 tablespoons in the bottom of each bowl before the broth goes in. Salting the pot makes the whole batch inflexible and it is not how ramen is built.
Roughly, per assembled bowl
A full bowl: about 1½ cups of broth, one portion of fresh ramen noodles, 3 oz of chicken chashu, one marinated egg and a teaspoon of aroma oil.
This is an estimate, not a lab analysis. The noodles are the largest single contributor, and how much fat you leave in the broth moves it more than anything else. Broth alone comes in at roughly 130 calories a serving.
The Tare and the Aroma Oil
These are the two components home cooks skip and restaurants never would. The broth is the body of a bowl of ramen; the tare is its seasoning and the aroma oil is its smell. Without them you have very good chicken soup.
Shoyu tare — no sake, no mirin
Combine ½ cup soy sauce, 2 tbsp water, 1 tbsp sugar, 1 tsp rice vinegar, a 4-inch piece of kombu and 2 dried shiitake in a small pan. Warm gently to just below a simmer, then take it off the heat and leave it to steep for 30 minutes. Strain.
Use about 2 tablespoons per bowl, in the bottom, before the broth goes in. It keeps a month in the refrigerator and it is what makes the difference between seasoned and salty.
Aroma oil
Warm ½ cup of chicken fat or neutral oil with the white parts of 4 spring onions and 3 sliced garlic cloves over the lowest heat you can manage for 15 minutes. The garlic should never colour past pale gold — the moment it browns the oil turns bitter. Strain and keep.
A teaspoon per bowl, floated on top at the end. This is the smell that reaches the table before the bowl does.
Why the broth stays unsalted: seasoning per bowl means one pot of broth can become a shoyu bowl, a salt-seasoned shio bowl or a miso bowl on different nights. Salt the pot and you have locked yourself into one version of one dish.
Building the Bowl
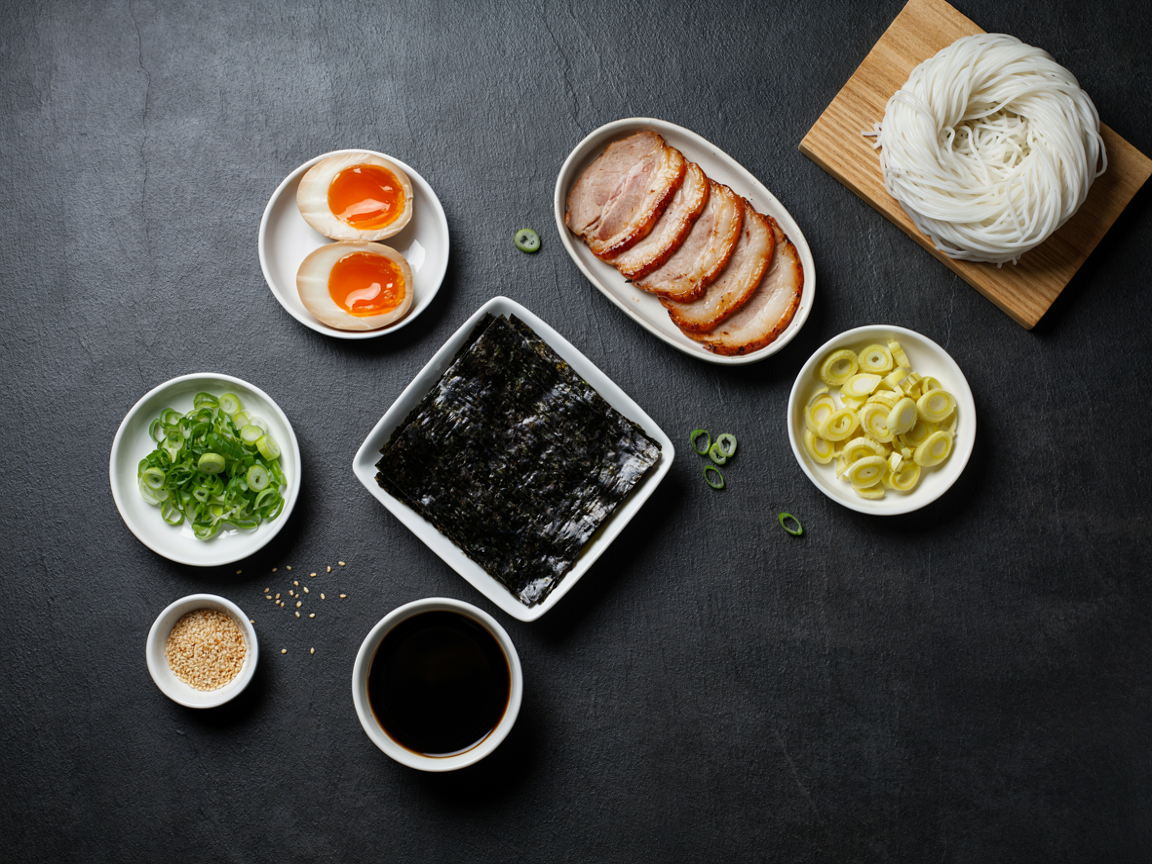
Everything ready before the noodles go in. Ramen assembly is measured in seconds, not minutes.
A great broth still makes a mediocre bowl if the other three components are missing. These are the parts that separate homemade ramen from restaurant ramen, and none of them are difficult.
Ajitama — the marinated egg
Boil for exactly 6 minutes 30 seconds, chill in ice water, peel, then steep in a quarter cup each of soy and water with 2 tbsp sugar and a splash of rice vinegar for 4 to 12 hours. No sake or mirin needed.
Chicken chashu
Roll boneless skinless thighs skin-side out, tie with string, and poach in the tare mixture for 45 minutes. Cool completely before slicing or it will fall apart. Chilled overnight it slices like deli meat.
The aroma oil
Warm half a cup of chicken fat or neutral oil with spring onion whites and sliced garlic over the lowest heat for 15 minutes, then strain. A teaspoon per bowl. This is the smell that hits before the first mouthful.
Everything else
Thin-sliced spring onion, a sheet of nori pressed against the rim, bamboo shoots, toasted sesame, and chilli oil for anyone who wants it. Build in this order: tare, broth, noodles, toppings.
The alcohol-free note: standard tare and ajitama marinades both use sake and mirin. Everything on this page replaces them with water, a little extra sugar and a splash of rice vinegar. You lose a small amount of complexity and nothing else — the salt, the sweetness and the acidity are all still there.
Substitutions That Actually Work
Ramen has a reputation for rigidity. Most of it is deserved, but these swaps hold up.
| Instead of | Use | What changes |
|---|---|---|
| Instead ofChicken feet | UseExtra wings and backs, or a split pig-free trotter alternative such as more skin-on thighs | What changesLess body — reduce the finished broth by an extra quarter to compensate |
| Instead ofFresh ramen noodles | UseDried chukamen blocks from an Asian supermarket | What changesCook them 30 seconds under the packet time; they keep softening in hot broth |
| Instead ofSake and mirin in the tare | UseWater with a little extra sugar and a splash of rice vinegar | What changesThis is the alcohol-free version used throughout this recipe — slightly less complex, no real loss |
| Instead ofPork chashu | UseBoneless skinless chicken thighs, rolled, tied and simmered in the tare | What changesLeaner and lighter; it slices cleanly once chilled |
| Instead ofKombu in the tare | UseA teaspoon of dried shiitake, soaked, plus its soaking liquid | What changesEarthier rather than oceanic, and easier to find |
| Instead ofA stockpot | UseA pressure cooker for 90 minutes, then a hard uncovered boil for 30 to 45 | What changesFaster, but the final boil is not optional — pressure cannot emulsify |
| Instead ofBamboo shoots | UseThinly sliced water chestnut, or simply more spring onion | What changesLoses a little texture contrast, nothing else |
The one swap not worth making: a gentle simmer instead of a hard boil, to save energy or noise. It is not a milder version of the same technique — it produces a completely different, clear broth. If you are not going to boil it hard, make chintan on purpose instead.
Make Ahead, Store and Freeze
Pick your timeline:
Cooking it over two days
This is how to make it manageable. Day one: blanch, boil, strain, cool and refrigerate the broth overnight. Day two: make the tare, the aroma oil, the eggs and the chashu while the broth reheats. Splitting it this way turns a punishing single session into two easy ones, and the broth is no worse for the rest.
Refrigerating
The strained broth keeps 4 days in the refrigerator and will set to a firm, wobbly jelly — that is exactly what you want to see, because it means you extracted plenty of gelatin. Tare keeps a month, aroma oil two weeks, ajitama three days in their marinade before they go too salty.
Freezing — up to 3 months
Broth freezes superbly. Cool it fast in a sink of iced water, portion into bags laid flat, and freeze for up to 3 months. Thaw overnight in the refrigerator and reheat gently, whisking as it comes back together — a half-thawed paitan can look alarmingly separated and will re-emulsify with heat and a whisk.
Assembling for several people
Have everything ready before a single noodle goes in the water, because ramen waits for nobody. Warm the bowls with hot water and tip it out. Tare in each bowl, hot broth over it, noodles cooked last and drained hard, toppings arranged, serve immediately. From drained noodles to the table should be under 30 seconds.
Troubleshooting
Pick whatever went wrong:
The broth is thin and watery
Not enough collagen, or not enough reduction. The fix: boil the strained broth hard and uncovered until it drops by a quarter, which concentrates both body and flavour. Next time add chicken feet — they are the cheapest and most effective source of gelatin available, and they are the difference between a good broth and a great one.
It is greasy rather than creamy
The fat has separated out and is floating on top instead of being suspended through the broth. The fix: return it to a hard boil and whisk vigorously, or blitz it briefly with an immersion blender — both will force it back into emulsion. Greasy means broken, not too fatty; the fat is meant to be in there.
The broth turned grey and murky
The bones were not blanched, so the scum and blood proteins that should have been discarded stayed in the pot. The fix: there is no rescue for colour once it is in, but straining through a fine sieve lined with muslin will improve it. Next time, always blanch for 10 minutes, drain, rinse every piece and scrub the pot.
It tastes bland
The broth is unsalted on purpose, so this usually means the tare was skipped or under-measured. The fix: about 2 tablespoons of tare per bowl, in the bottom, before the broth. If it is still flat with the tare in, the aromatics went in too early and boiled away — add them in the final hour only.
It tastes bitter or harsh
Alliums cooked too long. Onion, garlic and leek turn acrid over several hours at a rolling boil. The fix: add them for the last hour only, and never let garlic colour in the aroma oil — it should be warmed at the lowest possible heat and strained out while still pale gold.
Questions, Answered
Why is my ramen broth not white and creamy?
The heat is too low. A creamy white broth is an emulsion, and emulsions need violent agitation to form — that means a hard, constant, rolling boil for hours, not the gentle simmer used for a clear stock. If your broth is still translucent after two hours, turn the heat up rather than waiting longer.
Can you make tonkotsu-style ramen without pork?
Yes. Tonkotsu means pork bone specifically, so a chicken version is not tonkotsu — it is tori paitan, which is a traditional Japanese broth in its own right. It is made exactly the same way, emulsified by hard boiling, and produces the same opaque, creamy, lip-coating bowl. It is a little lighter and a little sweeter than pork.
What do chicken feet do in ramen broth?
They are almost pure collagen and skin, which is exactly what a paitan broth needs. Collagen breaks down into gelatin, gelatin gives the broth body, and the skin supplies the fat that emulsifies into it. A broth made without them will still work but will taste noticeably thinner. Most Asian supermarkets sell them cheaply.
How long does ramen broth need to boil?
Four hours at a hard rolling boil is the practical minimum, and six is better. You are not just extracting flavour, you are physically breaking down collagen and emulsifying fat into water, and that takes sustained time at a full boil. Topping up with boiling water as it reduces does not reset the clock.
Can I make ramen broth in a pressure cooker?
Partly. A pressure cooker extracts gelatin brilliantly in about 90 minutes, but it cannot emulsify, because emulsification needs the agitation of a rolling boil that a sealed pot does not provide. The workaround is to pressure cook for 90 minutes, then boil the strained broth hard and uncovered for a further 30 to 45 minutes to bring it together.
What is tare and do I really need it?
Tare is the concentrated seasoning that goes in the bottom of the bowl before the broth is poured in, and it is the reason restaurant ramen tastes seasoned and homemade ramen often tastes flat. The broth itself is left unsalted so that one pot can become shio, shoyu or miso bowls. Skipping it is the most common reason a good broth produces a disappointing bowl.
Can I freeze ramen broth?
Yes, and it freezes better than almost anything else. Cool it quickly, portion it into containers or bags and freeze for up to 3 months. It will set to a firm jelly in the refrigerator first, which is a good sign rather than a problem. Reheat gently and whisk as it comes back together, since it can look separated when half thawed.
What noodles should I use?
Fresh alkaline ramen noodles, from the refrigerated section of an Asian supermarket. The alkalinity is what gives them their springy bite and yellow colour, and nothing else substitutes convincingly. Failing that, the dried blocks sold as chukamen work; regular Italian pasta does not, and instant noodle blocks are a distant last resort.
Blanch the bones, boil them harder than feels reasonable for four hours, never skim the fat, and season in the bowl rather than the pot. That is the whole method, and the rest is patience.
Pin this creamy ramen broth recipe so the timings and the tare ratios are there when you have a free Saturday — then come back and tell us how white you got it.

