
How to Use an Instant Pot: A Step-by-Step Beginner Guide
Add food and liquid, lock the lid, turn the valve to Sealing, choose Pressure Cook and set the time. After the beep, release the pressure and open the lid.
To use an Instant Pot, add the food and at least the minimum liquid, lock the lid, turn the steam release to Sealing, press Pressure Cook and set the time. After the beep, let the pressure release naturally or turn the valve to Venting, then open the lid once the float valve drops.
Do a water test first. It shows how the pot seals, builds pressure and releases before you cook real food.
1. Add food and liquid. 2. Lock the lid and set the valve to Sealing. 3. Choose Pressure Cook and set the time. 4. Wait while it builds pressure, about 10 minutes or more. 5. Release the pressure naturally or with a quick release. 6. Open the lid once the float valve drops.
The water test, full steps, release chart and six handy accessories are below.
Product links go to Amazon. As an Amazon Associate, Kitchen Guide 101 earns from qualifying purchases.
Instant Pot Accessories Compared
All 6 side by side. Tap any name to see it on Amazon.
| Accessory | Type | Fits | Use for | Best for | Price |
|---|---|---|---|---|---|
| Instant Pot Sealing Ring 2-Pack for 6-Quart Pots | Sealing rings | 6 qt pots | Every pressure cook | Savory and sweet | $ |
| Instant Pot Tempered Glass Lid | Glass lid | Match the pot size | Slow cook, sauté, warm | Watching the food | $ |
| Instant Pot Mini Mitts, Set of 2 | Silicone mitts | Any size | Lifting the inner pot | Safety | $ |
| Silicone Steamer Basket for Pressure Cookers | Steamer basket | 6 qt and larger | Steaming | Vegetables and eggs | $ |
| Silicone Egg Bites Mold with Lid | Egg bites mold | 6 qt and larger | Pressure cooking on the trivet | Breakfast | $ |
| 7-Inch Springform Pan | Springform pan | 6 qt and larger | Pressure cooking on the trivet | Cheesecake | $ |
Details are as stated on each Amazon listing at time of writing and can change. Price tiers: $ under $20 · $$ $20–50.
6 Accessories That Make an Instant Pot Easier to Use
None is required, but each one helps from the first week.

Instant Pot Sealing Ring 2-Pack for 6-Quart Pots
The silicone ring in the lid is what lets the pot seal and build pressure. Silicone holds smells, so keep one ring for savory food and one for sweet.
This pack is for 6-quart pots. Buy the size that matches yours.
- A spare when one wears out
- No garlic-scented cheesecake
- Low price tier
- Size must match the pot
- Replace when stretched or cracked
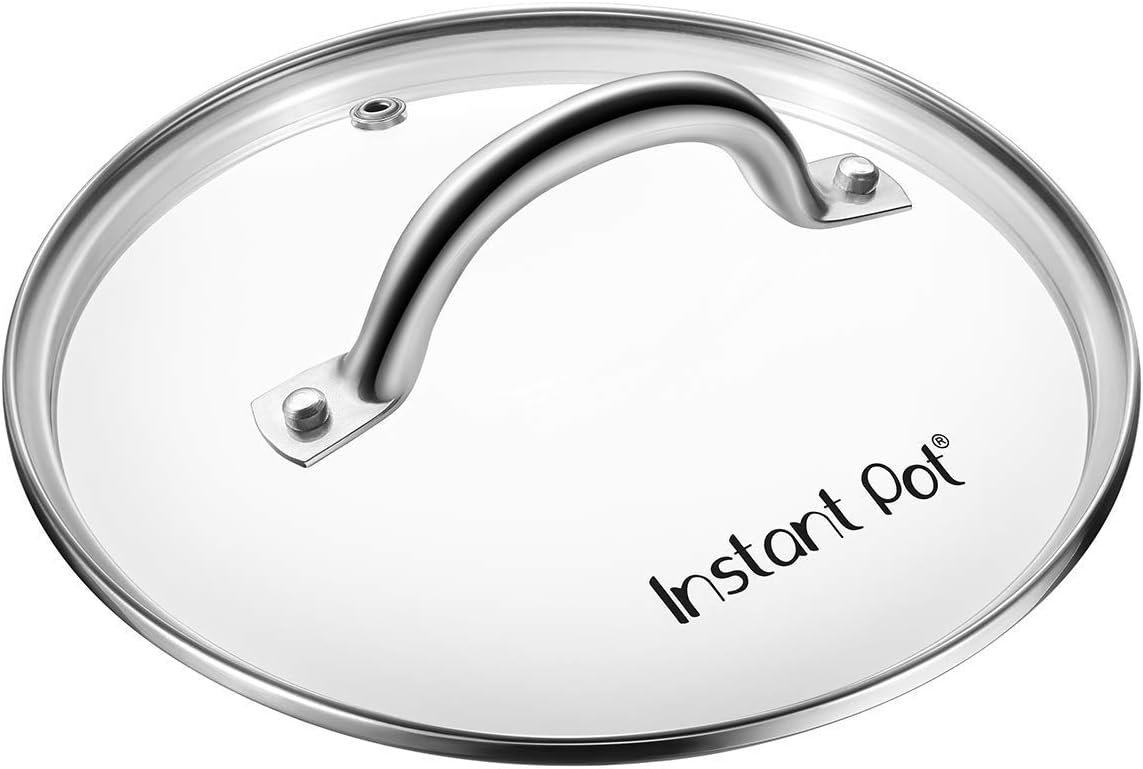
Instant Pot Tempered Glass Lid
A see-through lid for every program that does not need pressure: slow cook, sauté, simmer and keep warm. It does not seal, so never use it to pressure cook.
Pick the size that matches your pot.
- See the food cook
- Handy for buffets
- Low price tier
- Not for pressure cooking
- Must match the pot size
Instant Pot Mini Mitts, Set of 2
Small silicone mitts made for lifting a hot inner pot. They grip the rim and the trivet handles better than bulky oven gloves.
- Safe grip on hot pots
- Wipe clean
- Low price tier
- Small coverage
- Not for long holds
Silicone Steamer Basket for Pressure Cookers
A basket keeps food above the water so it steams instead of boiling. Handles let you lift it out of a hot pot in one move.
- Easy to lift out
- Will not scratch the pot
- Folds to store
- Check it fits your pot size
- Silicone can hold smells
Silicone Egg Bites Mold with Lid
Cafe-style egg bites at home. Fill the cups, cover with the lid and pressure cook on the trivet.
It also freezes small portions of sauce and stock.
- Egg bites in minutes
- Lid included
- Doubles as a freezer tray
- Needs the trivet
- Check the size against your pot
7-Inch Springform Pan
The size that fits a 6-quart pot. A 7-inch springform makes a creamy pressure-cooker cheesecake with no oven water bath.
Wrap the base in foil to keep steam out.
- Fits 6 qt pots
- Removable bottom
- Low price tier
- Wrap to keep water out
- Smaller cake
Start With the Water Test
| Step | What to do |
|---|---|
| 1 | Put the inner pot in the cooker and add 3 cups of water. |
| 2 | Close and lock the lid, then turn the steam release to Sealing. |
| 3 | Select Steam and set the time to 2 minutes. |
| 4 | Wait while it builds pressure. The float valve pops up and the countdown starts. |
| 5 | When it beeps, turn the valve to Venting, keeping hands and face away from the steam. |
| 6 | Open the lid once the float valve has dropped. |
Steps from the Instant Pot manual’s initial test run. Models differ, so follow your own manual.
How to Pressure Cook in an Instant Pot, Step by Step
| Step | What to do | Tip |
|---|---|---|
| 1. Brown (optional) | Press Sauté and brown the meat or onions. | Scrape up stuck bits before pressure cooking. |
| 2. Add liquid | Add at least the minimum thin liquid, such as water or stock. | Duo Plus: 1½ cups (3 qt), 2 cups (6 qt), 3 cups (8 qt). |
| 3. Mind the lines | Stay under the two-thirds line, or halfway for foods that foam or expand. | Oatmeal, beans and grains expand. |
| 4. Lock the lid | Close the lid and turn the steam release to Sealing. | Check the sealing ring is seated. |
| 5. Set the time | Press Pressure Cook (Manual on older models) and set the minutes. | High pressure suits most recipes. |
| 6. Wait | The pot builds pressure, the float valve rises and the countdown begins. | About 10 minutes or more. |
| 7. Release | Use a natural release, a quick release or both, as the recipe says. | See the release chart below. |
| 8. Open | When the float valve drops, turn the lid and lift it away from you. | Never force the lid open. |
Release steam away from your face and from upper cabinets.
Natural Release vs Quick Release
| Method | How | Use for |
|---|---|---|
| Natural release | Leave the valve on Sealing until the float valve drops on its own. | Meats, soups, beans, grains and starchy foods |
| Quick release | Turn the valve to Venting, or press the release button on newer models. | Vegetables and other delicate foods |
| Both | Natural release for about 10 minutes, then quick release the rest. | Many meat and rice recipes |
Large amounts of liquid and starchy foods can spatter and clog the valve on a quick release, so let those release naturally.
Common Instant Pot Problems and Fixes
Burn or Ovht on the screen
The bottom of the pot is overheating. Add thin liquid, scrape the bottom and keep thick sauces on top.
Steam leaking from the lid
Check the sealing ring is seated and the valve is on Sealing.
The float valve will not rise
Check the ring, the valve setting and that there is enough liquid.
The lid will not open
Pressure is still inside. Wait for the float valve to drop.
The ring smells
Silicone holds smells. Keep one ring for savory food and one for sweet.
Keep Warm runs on
On the Duo Plus it runs up to 24 hours. For rice, stop it within 2 hours.
Ready to cook? Try Instant Pot lentil soup or Instant Pot taco soup.
Instant Pot Tips for Beginners
Five habits that prevent most problems.
Never skip it
Thin liquid makes the steam.
Check it every time
Sealing to cook, Venting to release.
Look before you lock
A missing ring means no pressure.
Count the build-up
Recipes list time at pressure only.
Mind where it goes
Keep it away from faces and cabinets.
More Instant Pot guides: the best Instant Pots, Instant Pot accessories, electric pressure cookers and Instant Pot recipes.
How to Use an Instant Pot FAQs
How do you use an Instant Pot for the first time?▼
Do the water test: 3 cups of water, valve on Sealing, Steam for 2 minutes, then release the pressure and open the lid.
How much liquid do you put in an Instant Pot?▼
At least the minimum in your manual. For the Duo Plus, that is 1½ cups for 3 quarts, 2 cups for 6 quarts and 3 cups for 8 quarts.
Should the valve be on sealing or venting?▼
Sealing to pressure cook. Venting to release pressure or to slow cook.
How long does an Instant Pot take to build pressure?▼
About 10 minutes or more, longer when the pot is full or the food is cold.
What is the difference between natural and quick release?▼
Natural release lets the pressure drop on its own. Quick release lets the steam out at once through the valve.
Why does an Instant Pot say Burn?▼
The bottom of the pot is overheating, usually from too little thin liquid or food stuck to the bottom.
Can you open an Instant Pot while it is cooking?▼
Not under pressure. The lid stays locked until the float valve drops. On Sauté or Slow Cook, you can.
How full can you fill an Instant Pot?▼
Up to the two-thirds line, or halfway for foods that foam or expand, such as oatmeal, beans and grains.
The Bottom Line
- First: run the water test.
- Every time: enough liquid, ring in place, valve on Sealing.
- After the beep: natural release for meats, soups and grains, quick release for vegetables.
- First add-ons: Instant Pot Sealing Rings and a Instant Pot Glass Lid.
Liquid, ring, Sealing, time, release: the same five checks every time.