No-Bake · 15 Minutes · 4 Ingredients
Easy Dirt Cake Recipe (Oreo Dirt Pudding) With Just 4 Ingredients
Crushed chocolate cookies, silky chocolate pudding and clouds of whipped topping, layered into cups and chilled until they set. No oven, no mixer, no fuss.
- 15 min hands-on
- Chills while you do everything else
- Makes 8 cups
- Kid-friendly
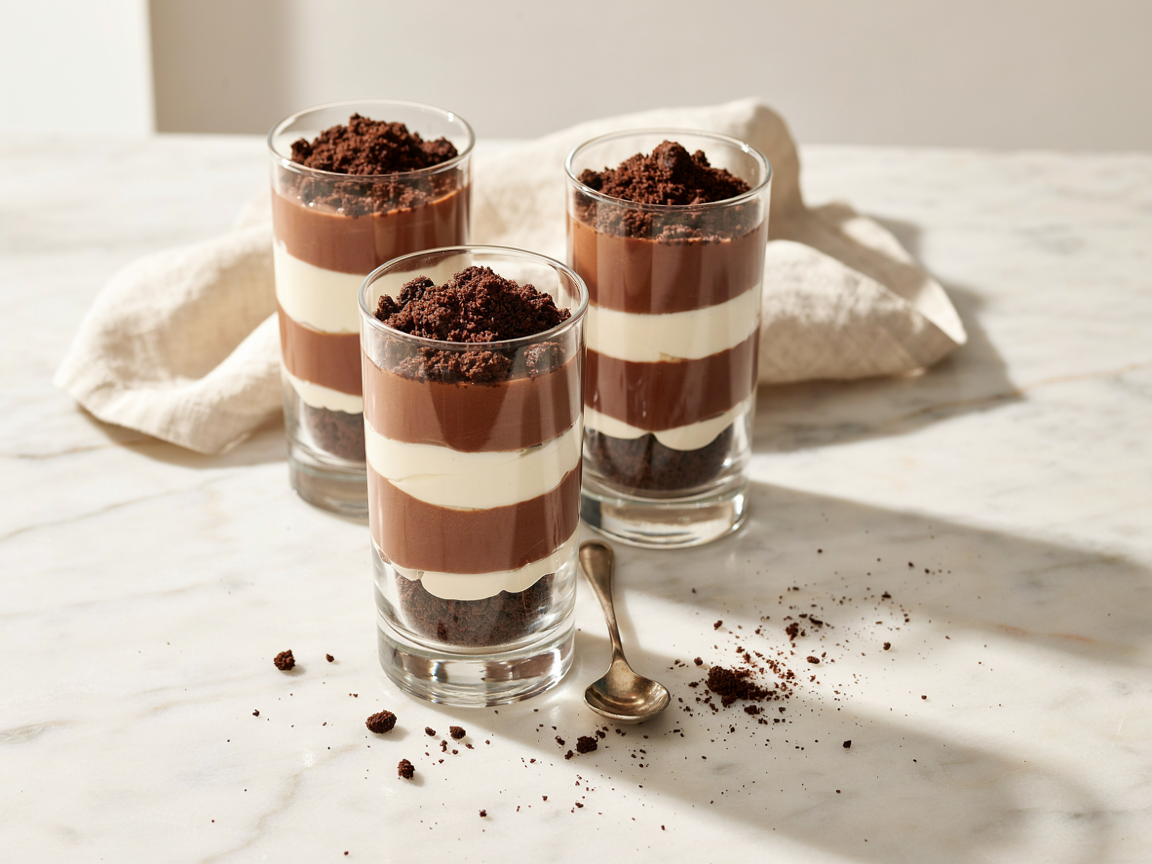
Five clean layers, one bowl, and zero baking.
This dirt cake recipe is the four-ingredient, no-bake dessert that has quietly saved more last-minute birthday parties, potlucks and school bake sales than almost anything else in the rotation. There is no batter, no oven and no mixer — just crushed chocolate sandwich cookies, a box of instant chocolate pudding, cold milk and whipped topping, layered into cups and left in the fridge to set.
What makes it worth making properly rather than throwing together is the layering. Done carelessly, it turns into a brown bowl of mush. Done with a little attention, you get those crisp horizontal stripes through the glass that make people reach for their phones before their spoons. The technique takes about four extra minutes, and it is all below.
Save the pin so the recipe is waiting next time dessert sneaks up on you.
Why This Dirt Cake Recipe Works Every Time
Most no-bake desserts ask you to trust that something will set. This one does not. Instant pudding thickens through starch rather than eggs or gelatin, so it firms up on the counter in about five minutes whether or not the kitchen is warm, whether or not you whisked it perfectly. That single property is why dirt cake is close to impossible to ruin.
The other half of the magic is the cookie. Chocolate sandwich cookies crushed with the filling still in them behave differently from plain cookie crumbs. The filling coats the crumbs in a thin layer of sweetened fat, which does two things: it stops the crumbs from turning to sludge the moment they touch pudding, and it keeps the “dirt” tasting rich instead of dusty. This is why the recipes that tell you to scrape out the filling produce a noticeably drier dessert.
No oven, no heat
Nothing gets cooked, so there is nothing to overbake, curdle or split. In a hot kitchen in July, that matters.
It improves overnight
The crumbs soften slightly, the pudding sets fully and the layers settle into each other. Day-two dirt cake is arguably better than day-one.
Scales without math
Everything runs on whole boxes and whole tubs, so doubling for a crowd is genuinely just doubling.
The 4 Ingredients (And What Each One Actually Does)
Four is not a marketing number here. These are the only things you need, and each one is doing a specific job.
Chocolate sandwich cookies
One standard 14.3 oz package, crushed whole — filling included. Aim for a mix of textures rather than uniform dust: mostly fine crumbs for the layers, plus about a cup of coarse, gravelly pieces reserved for the top so it actually looks like soil. Regular, double-filled and thin versions all work; double-filled gives a slightly sweeter, richer crumb.
Instant chocolate pudding mix
This must be instant, not cook-and-serve. Cook-and-serve pudding needs to be boiled and then chilled for hours, and it sets much firmer — it will fight you when you try to layer it. One large 5.9 oz box makes enough for eight cups. Chocolate fudge, dark chocolate and plain chocolate are all fine; the darker the mix, the more convincing the “dirt” colour.
Cold milk
Whole milk gives the best body, but 2% works. It genuinely needs to be cold from the fridge — instant pudding sets by hydrating starch, and warm milk slows that down, which is the single most common reason people end up with soup. One useful trick: use ¼ cup less milk than the box calls for. The pudding sets firmer, holds its layer edge better, and tastes more intensely chocolatey.
Whipped topping
An 8 oz tub, thawed overnight in the fridge — never in the microwave, which breaks the emulsion and leaves you with a weeping puddle. Half of it gets folded into the pudding to lighten it into something closer to mousse; the other half stays white and becomes the bright stripe between the dark layers. If you would rather use fresh whipped cream, see the swap notes below.
Optional, and worth mentioning: gummy worms are the classic garnish and the reason kids lose their minds over this dessert. Most standard gummy worms are made with pork-derived gelatin, so if that matters in your kitchen, look for halal-certified or gelatin-free gummy candies — pectin-based versions are widely available and behave exactly the same on top of the crumbs.
Sensible swaps
- Fresh whipped cream instead of whipped topping: whip 2 cups heavy cream with 3 tablespoons powdered sugar to stiff peaks. It tastes better but softens faster, so assemble the same day.
- Vanilla pudding instead of chocolate: gives you a pale “sand” layer and a stronger contrast against the dark crumbs.
- Dairy-free: use almond or oat milk with instant pudding (it sets slightly softer — cut the milk by a full ⅓ cup) and a coconut-based whipped topping.
- Extra-creamy version: beat 8 oz softened cream cheese with ½ cup powdered sugar and fold it into the whipped topping. Not four ingredients anymore, but it is the richer, more traditional take.
Oreo Dirt Pudding Cups — The Recipe
Easy 4-Ingredient Dirt Cake Cups
No-bake layered chocolate cookie and pudding dessert, chilled until set and finished with a thick crumb topping.
Adjust the batch
Ingredients
- 18 cookies (½ package)36 cookies (one 14.3 oz package)54 cookies (1½ packages)72 cookies (two 14.3 oz packages) chocolate sandwich cookies, crushed with the filling
- 1 small box (3.9 oz)1 large box (5.9 oz)1 large + 1 small box (9.8 oz)2 large boxes (11.8 oz) instant chocolate pudding mix
- 2 cups3 cups5 cups6 cups cold whole milk (use ¼ cup less for a firmer set)
- 4 oz8 oz12 oz16 oz whipped topping, thawed in the refrigerator
- Optional halal or gelatin-free gummy worms, for the top
Instructions
Crush the cookies
Pulse the cookies in a food processor until mostly fine, or seal them in a zip-top bag and roll over them with a rolling pin. Set aside about 1 cup of the coarsest crumbs for the topping.
Whisk the pudding
Whisk the instant pudding mix into the cold milk for a full 2 minutes, until smooth and noticeably thickened. Let it stand 5 minutes to finish setting.
Lighten it
Fold half the whipped topping into the pudding with a spatula until just combined and streak-free. Keep the remaining half plain and cold for the white layers.
Layer the cups
Into each glass, spoon a base of cookie crumbs, then chocolate pudding, then plain whipped topping. Repeat once, finishing with a thick layer of the reserved coarse crumbs.
Chill until set
Refrigerate at least 4 hours, ideally overnight. The crumbs soften into the layers and the pudding firms up enough to hold a clean spoonful.
Garnish and serve
Add gummy worms just before serving so they stay firm rather than sweating into the crumbs. Serve cold, straight from the fridge.
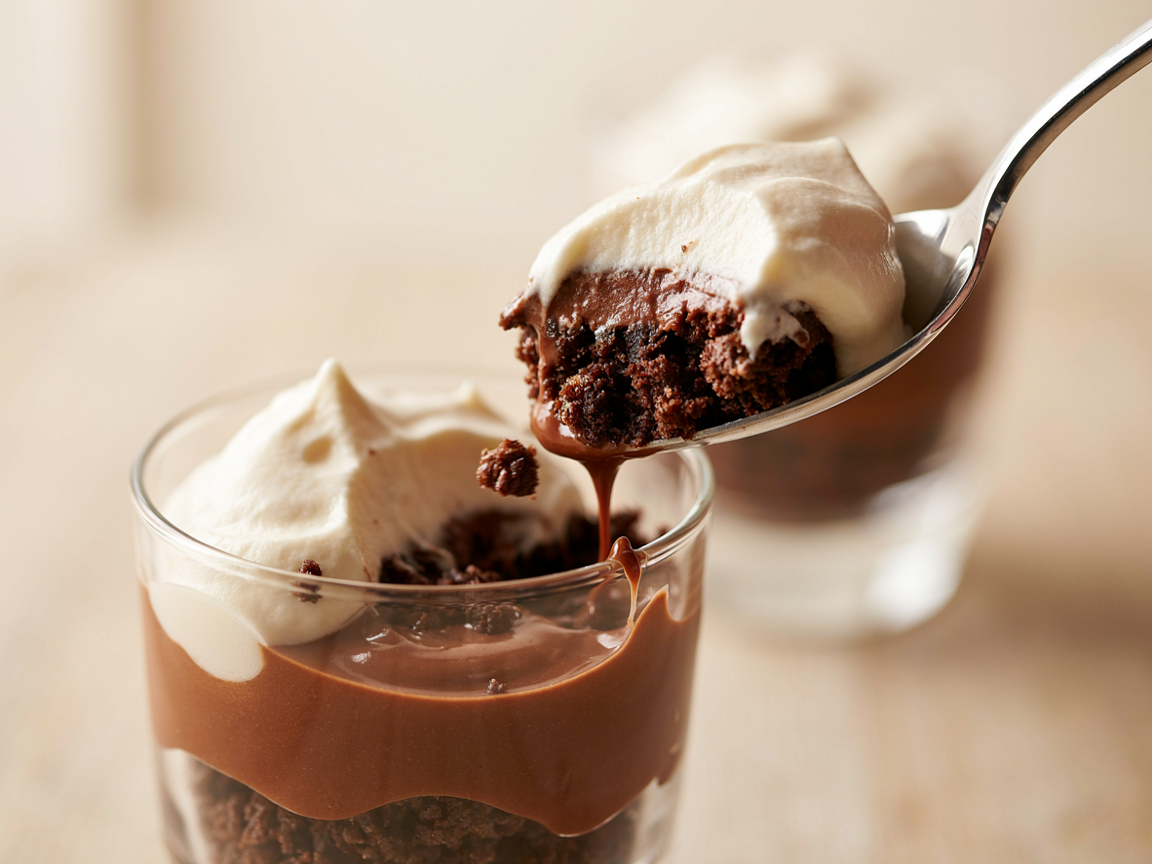
The spoon test: a properly chilled cup holds its layers right up until the moment you break them.
How to Layer Dirt Cups So They Look Like the Photo
This is the part that separates a photogenic dessert from a muddy one, and it costs about four extra minutes.
Use a piping bag — or a zip-top bag with the corner cut off. Spooning pudding into a narrow glass smears it up the sides, and those smears never disappear. Piping it straight down into the centre lets the layer spread itself flat and leaves the glass wall clean.
Keep the crumb grades separate. Fine crumbs compact into a neat dark band inside the glass. Coarse crumbs look like soil but leave gaps when used mid-layer. Fine on the inside, coarse on top.
Tap, do not press. After each layer, tap the base of the glass gently on a folded towel. The layer levels itself. Pressing down with a spoon compresses the crumbs into a dense, hard disc.
Work in one direction. Do all the crumb layers across every glass, then all the pudding, then all the whipped topping. Changing tools between every glass is where mess happens.
Wipe the rims. A damp paper towel around the inside rim before the final crumb layer takes ten seconds and is the difference between “homemade” and “bakery”.
Straight-sided glasses beat curved ones. Tumblers, small mason jars and stemless wine glasses all show layers crisply. Bowl-shaped glasses distort the bands and hide the effort you just put in.
Make It Ahead, Store It, Freeze It
Pick your timeline:
Serving today
Assemble everything including the crumb topping, cover the glasses loosely with plastic wrap and chill for a minimum of 2 hours — 4 is better. Below 2 hours the pudding is set but the crumbs are still crunchy and separate rather than melded. Add gummy worms in the final ten minutes.
1–3 days ahead
This is the sweet spot. Assemble the layers but hold back the top crumb layer and any garnish, cover tightly and refrigerate. Add the coarse crumbs and worms within an hour of serving so the top stays dry and gravelly instead of turning into a soft paste. Three days is the outer limit before the cookie flavour starts to flatten.
Freezing
It freezes better than most people expect. Assemble without the crumb top or garnish, wrap each glass in plastic then foil, and freeze up to 1 month. Thaw overnight in the refrigerator — never at room temperature, which makes the whipped topping weep. Expect the texture to be marginally softer than fresh. Frozen straight from the freezer and eaten semi-solid, it also doubles as a decent ice-cream-style dessert.
Leftovers
Keep covered in the refrigerator and eat within 3 days. The crumbs will continue to soften, so by day three you have something closer to a chocolate trifle than a layered cup — still very good, just different. Do not leave assembled cups at room temperature for more than 2 hours; dairy-based pudding and whipped topping are not shelf-stable.
Trifle Bowl, 9×13 Pan, and Four More Ways to Change It Up
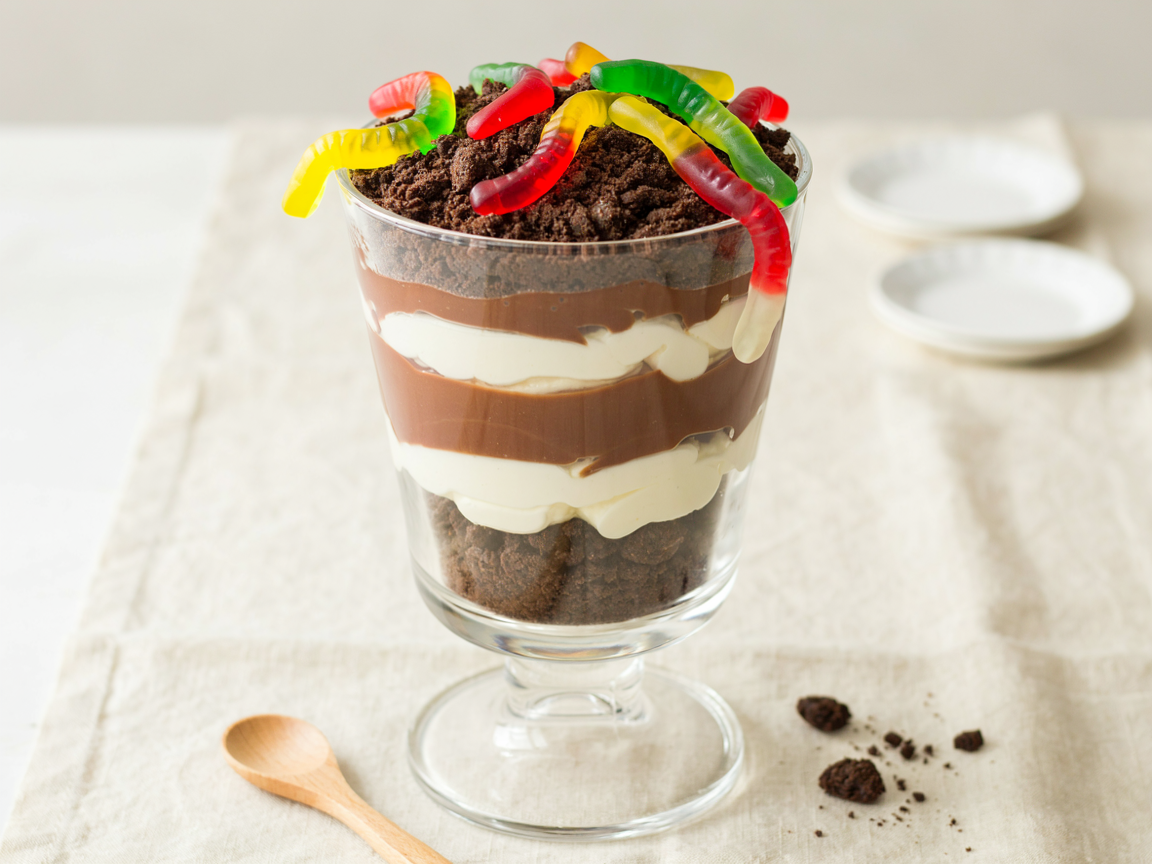
One big trifle bowl feeds a crowd and takes half the assembly time of individual cups.
Glass trifle bowl
Same quantities, one 3-quart footed bowl. Because the layers are wider, use slightly more crumb per layer so the bands read clearly through the glass. Serves 10–12 with a large spoon. This is the fastest version by a distance.
9×13 pan (dirt cake bars)
Press two-thirds of the crumbs firmly into the base of a 9×13 dish, spread the lightened pudding over it, then the plain whipped topping, then the remaining crumbs. Chill at least 6 hours so it slices. Cut with a hot, dry knife, wiping between cuts.
Mint dirt cake
Swap in mint-filled chocolate sandwich cookies and add ¼ teaspoon peppermint extract to the pudding. A drop of green colouring in the whipped layer makes the contrast pop.
Peanut butter
Whisk ⅓ cup smooth peanut butter into the pudding before folding in the whipped topping. Rich and noticeably denser — reduce the milk by another 2 tablespoons.
Sand cups
Golden vanilla sandwich cookies plus vanilla instant pudding. Pale, buttery and perfect for a beach theme with a few candy shells on top.
Mocha
Dissolve 2 teaspoons instant coffee granules into the cold milk before adding the pudding mix. Deepens the chocolate considerably and takes the edge off the sweetness.
Dirt Cake Troubleshooting: Fix It in One Step
Pick whatever went sideways:
Pudding stayed runny
Almost always one of three things: the milk was not cold, the mix was cook-and-serve rather than instant, or it was whisked for under 2 minutes. The fix: whisk in an extra 2 tablespoons of dry instant pudding mix and refrigerate for 30 minutes before layering. It will thicken.
Crumbs went soggy
The top crumb layer went on too early, or the cookies had their filling scraped out. The fix: next time hold the coarse crumb topping back and add it within an hour of serving. To rescue the current batch, scrape off the soft top and replace it with fresh crumbs right before it goes on the table.
Layers look messy
Spooning rather than piping is the usual culprit — pudding drags along the glass and leaves streaks. The fix: pipe from a bag with a wide opening straight down the centre, tap the glass to level each layer, and wipe the inside rim before the final crumbs.
Too sweet
Cookies, pudding and whipped topping are all sweetened, so the stack compounds. The fix: switch to a dark chocolate or chocolate fudge pudding mix, add a pinch of salt to the pudding, or stir 2 teaspoons of instant coffee into the milk. Any of the three cuts the sugar noticeably without changing the ingredient count much.
Bars won’t slice
The pan version needs a compacted base and a longer chill than the cups. The fix: press the crumb base down hard with the flat bottom of a glass, chill a minimum of 6 hours, and cut with a knife dipped in hot water and wiped dry between every cut.
Dirt Cake Questions, Answered
Is dirt cake actually a cake?
No. Despite the name, there is no batter, no flour and no baking involved. Dirt cake is a layered no-bake pudding dessert made from crushed chocolate sandwich cookies, pudding and whipped topping. The name comes from the way the crumb topping looks like soil, especially once gummy worms are added.
Can I really make dirt cake with only 4 ingredients?
Yes. Chocolate sandwich cookies, instant chocolate pudding mix, cold milk and whipped topping are all you need. Many versions add cream cheese, butter and powdered sugar for a richer filling, but those are optional upgrades rather than requirements. The four-ingredient version sets properly and holds its layers.
How long does dirt cake need to chill?
A minimum of 2 hours, though 4 hours is better and overnight is best. The pudding sets within about 10 minutes, but the longer chill is what lets the cookie crumbs soften and meld into the layers. Under 2 hours the dessert tastes like separate components rather than one thing.
Why is my dirt cake watery?
The most common causes are milk that was not cold enough, using cook-and-serve pudding instead of instant, or whisking the pudding for less than the full 2 minutes. Thawing the whipped topping in the microwave rather than the refrigerator will also cause it to weep liquid into the layers.
Can I make dirt cake the day before?
Yes, and it is better for it. Assemble the layers up to 3 days ahead, but hold back the top crumb layer and any gummy worms until within an hour of serving so the topping stays dry and crumbly instead of turning soft.
Are gummy worms necessary?
No, they are purely decorative. They are what makes the dessert read as “dirt” to children, but the recipe tastes exactly the same without them. Standard gummy worms usually contain pork-derived gelatin, so look for halal-certified or pectin-based gelatin-free versions if that is a consideration.
Can I use homemade whipped cream instead of whipped topping?
Yes. Whip 2 cups of heavy cream with 3 tablespoons of powdered sugar to stiff peaks and use it in place of an 8 oz tub. It tastes fresher, but it softens faster and does not hold its layer as long, so assemble and serve the same day.
How many people does this dirt cake recipe serve?
As written it makes 8 individual cups of about 8 ounces each. Assembled in a 3-quart trifle bowl the same quantities serve 10 to 12, and pressed into a 9×13 pan it cuts into roughly 12 squares.
Four ingredients, fifteen minutes of actual work, and a dessert that looks like it took considerably more effort than it did. Whether you build it in individual cups, a trifle bowl or a 9×13 pan, the method is the same and the result is reliably good.
Pin this dirt cake recipe so it is waiting the next time you need a no-bake dessert in a hurry — then come back and tell us which version you made.