
Beetlejuice Strawberries: Spooky Black Chocolate Dipped Treats for Halloween
Glossy black-dipped strawberries piped with thread-thin white and lime-green stripes, a tiny collar and a bow tie: the striped-suit look from the pin, with the method that keeps the coating smooth, dry and crack-free.
- 24 berries, 45 minutes
- No tempering
- Six spooky looks
- Printable recipe
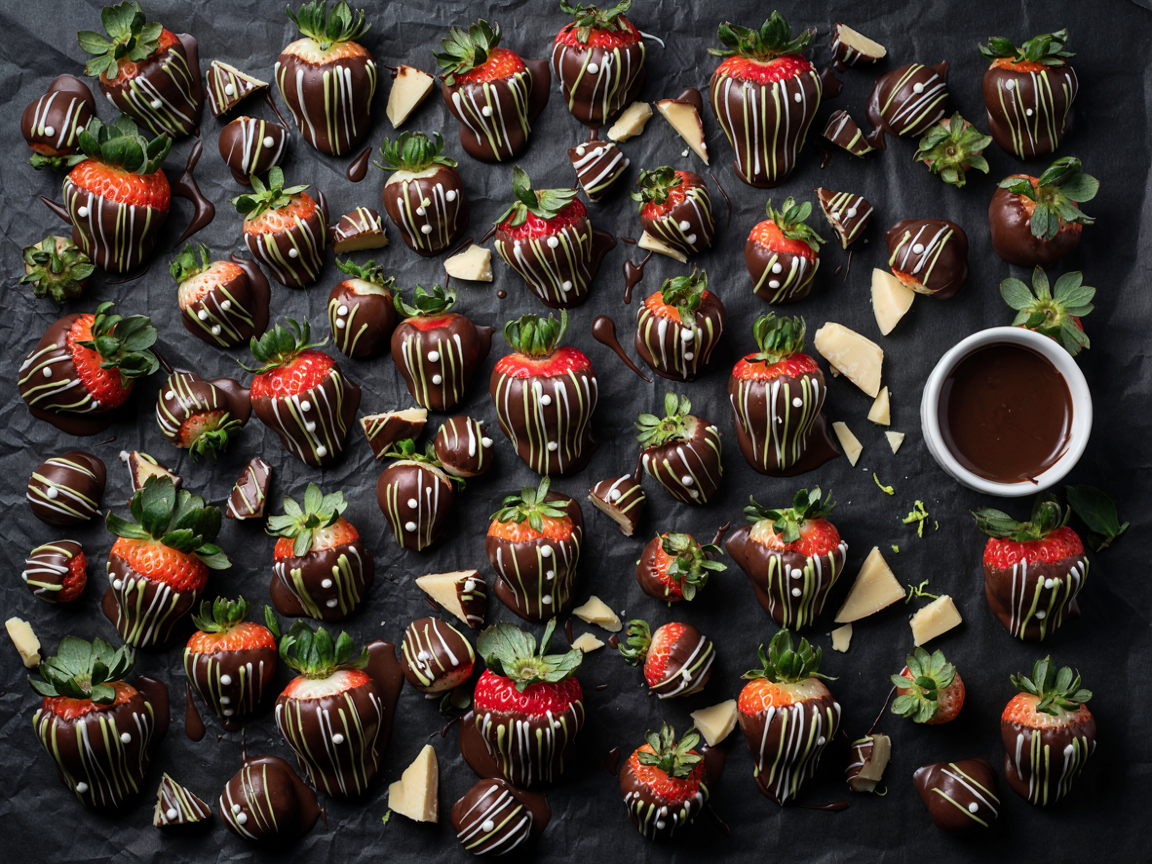
The tray from the pin: black-dipped strawberries with red shoulders and green tops, piped with thin white and lime-green stripes.
Beetlejuice strawberries are black-dipped strawberries piped with thin vertical stripes, and the whole trick is a bone-dry, room-temperature berry. Get that right and black candy melts set glossy in ten minutes, the stripes stay sharp and the coating never sweats or cracks. The card makes 24, enough for 8 to 12 guests.
In this post:
- Why these strawberries work
- What you need, and why
- The recipe, scaling from 12 to 48
- Five rules for a smooth, crack-free coat
- Candy melts vs real chocolate
- Six looks: bride, sandworm, tuxedo, mummy, spider
- Make ahead, storage and the sweating problem
- Troubleshooting, serving and 14 FAQs
Why These Beetlejuice Strawberries Work
The striped-suit look, made simple
A black coat, thin white stripes and a flash of lime green. The red shoulder and green top stay showing, so they still look like strawberries.
No tempering, no fridge
Black candy melts come jet black, set hard and glossy at room temperature in 10 minutes and do not need tempering.
Made the same day, gone the same night
Twenty-four berries from one bag of melts in about 45 minutes, ready a few hours before the party or the movie starts.
Easy enough for kids to help
Children can dip by the leaves and pipe dots and stripes; an adult does the microwave. Six more looks below, from tuxedo to spider.
What You Need for Beetlejuice Strawberries
Large strawberries
Firm, deep red, with fresh green tops to hold. About 2 lb gives 24 large ones. Long-stemmed berries are the easiest to dip; skip any soft or bruised ones.
Black candy melts
Sugar, vegetable fat and milk solids, already colored. Jet black out of the bag, no tempering, sets in minutes. A 12-oz bag is about 2 cups.
White and lime-green melts
For the stripes, collar and bow tie. One bag of white can do both: split it and tint half lime green with oil-based color.
Coconut oil or shortening
Refined coconut oil has no coconut taste. A teaspoon thins the melts so the coat goes on thin and smooth. Never butter or milk: both contain water.
Oil-based coloring
Sold as candy coloring. Water-based gel and liquid colors make chocolate and melts seize, so only use these if tinting white chocolate.
Black sanding sugar
Optional, for a glittery tip or the spider version. Check the label if you avoid carmine or confectioner’s glaze.
Piping bags
Disposable piping bags or small zip-top bags. Snip only the very tip for thread-thin stripes; a bigger hole makes thick, wobbly lines.
Black parchment
Gives the look on the pin and hides any drips. Plain parchment or wax paper works the same way.
Beetlejuice Strawberries Recipe
The card makes 24 large strawberries, enough for 8 to 12 guests. Tap a size and everything updates.
Beetlejuice Strawberries
The strawberries from the pin: glossy black-dipped berries with the green tops and a band of red showing, piped with thread-thin white and lime-green stripes and a little collar. Plus an hour for the berries to dry. Tap a size and the shopping list updates.
How many strawberries?
Ingredients
- 12 (about 1 lb)24 (about 2 lb)36 (about 3 lb)48 (about 4 lb) large strawberries with green tops, washed and completely dry
- 6 oz (1 cup)12 oz (2 cups)18 oz (3 cups)24 oz (4 cups) black candy melts (or dark chocolate and black cocoa, see the table)
- ½ tsp1 tsp1½ tsp2 tsp refined coconut oil or vegetable shortening
- ¼ cup½ cup¾ cup1 cup white candy melts, for the stripes and collars
- 2 tbsp¼ cup⅓ cup½ cup lime-green candy melts (or white tinted with oil-based color), for the stripes
- 1 tbsp2 tbsp3 tbsp¼ cup black sanding sugar, for the tips (optional)
- a few drops oil-based (candy) coloring, only if tinting white chocolate
Dry and room temperature is the whole secret: wet or cold berries seize the coating, crack it and sweat. Oil-based coloring only; water-based gels seize it too. Real chocolate works but needs tempering and never turns fully black; the table below compares them. Halal as written: common candy melts contain no gelatin or alcohol.
Instructions
Wash and dry completely
Rinse the strawberries with their tops on at least 1 hour ahead. Pat each one dry, then leave them on a towel at room temperature until no moisture shows, even around the leaves.
Line a tray and fill the bags
Line a sheet pan with black parchment, or plain parchment or wax paper. Put the white and the lime-green melts into two small piping bags or zip-top bags, unsnipped.
Melt the black coating
Put the black melts in a narrow, deep mug or bowl. Microwave at half power in 20-second bursts, stirring each time, until a few pieces remain, then stir until smooth. Stir in the coconut oil until the coating falls off the spoon in a thin ribbon.
Dip and twist
Hold a berry by its leaves and dip it two thirds of the way, leaving a band of red under the green top. Lift, twist and let the excess drip for 5 seconds, then scrape the tip on the rim. Lay it on its side on the tray. For a glittery tip, touch the wet point into sanding sugar.
Set the base
Leave the dipped berries 5 to 10 minutes at room temperature, until the black has lost its wet shine and is firm to a light touch. Piping on a wet base makes the stripes bleed.
Melt the stripe colors
Microwave the bags of white and lime-green melts at half power in 15-second bursts, kneading between, until fluid. Snip the very tip of each, about 1/16 inch, so the line comes out thread-thin.
Pipe the stripes
Pipe thin vertical white lines from the top of the black down to the tip, about 1/8 inch apart, so black and white alternate like a striped suit. Add one or two lime-green lines, or a few green dots, on each berry.
Add the collar (optional)
Just under the red band, pipe two tiny white triangles for a shirt collar and a small lime-green bow tie between them.
Set and serve
Leave 15 minutes at cool room temperature, until the stripes are firm. Serve the same day, ideally within 6 to 8 hours, from a cool spot rather than the fridge.
Five Rules for Smooth, Crack-Free Dipped Strawberries
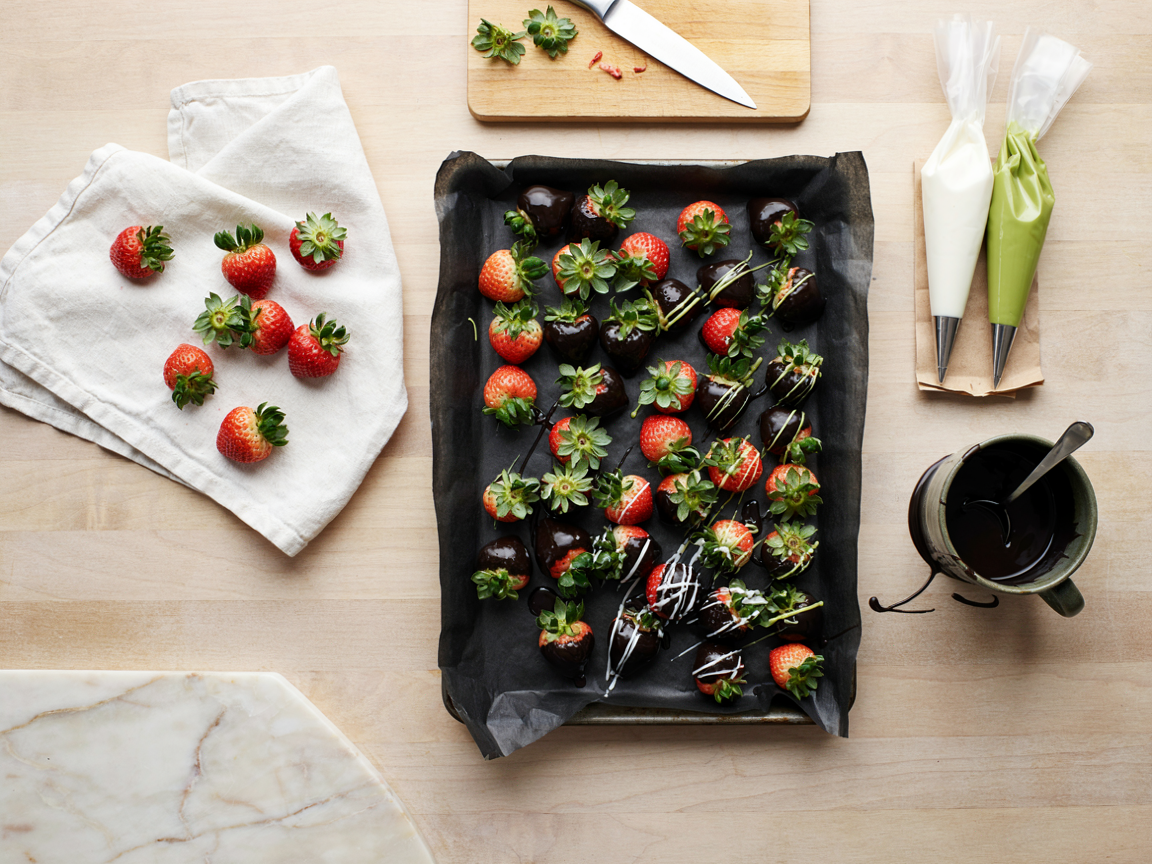
Mid-batch: dipped berries setting on black parchment, a mug of melted black coating and a snipped bag of white for the stripes.
Dry berries, completely
One drop of water seizes melted coating and makes it slide off the berry. Wash an hour ahead and let them air-dry on a towel, leaves and all.
Room-temperature berries
Cold berries from the fridge sweat as they warm, and they expand slightly and crack the set shell. Leave them out 30 to 60 minutes first.
Warm, never hot
Melt at half power in 20-second bursts and stop while a few pieces remain. Overheated melts go thick and grainy and set streaky.
A thin coat
A teaspoon of coconut oil thins the coating so it drips off in a ribbon. Thick coats look lumpy, crack and pull away from the berry.
Oil-based color, set base
Only oil-based color goes into melts or chocolate. Pipe stripes once the black has set, 5 to 10 minutes, so the lines stay sharp.
Candy Melts vs Chocolate for Beetlejuice Strawberries
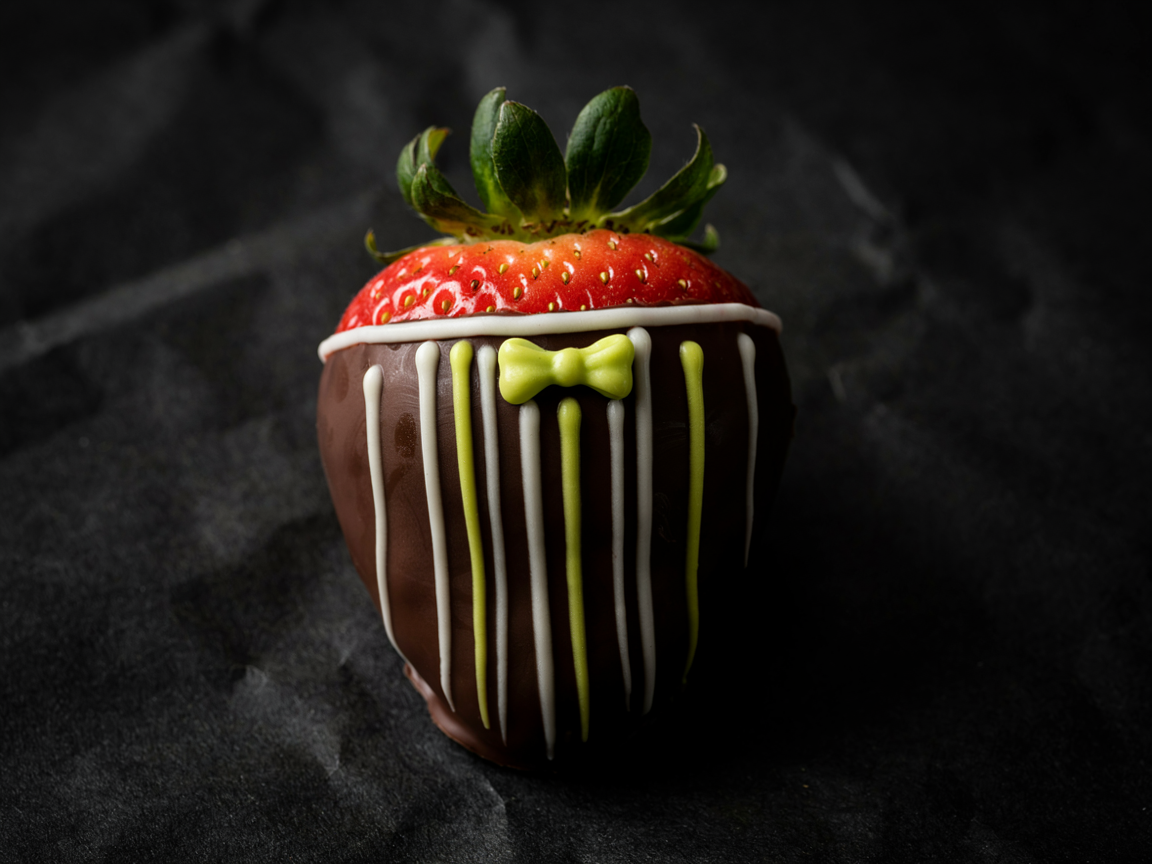
Up close: the glossy black candy melt coat, thread-thin white stripes, a lime-green line and a tiny collar and bow tie.
Both work. Candy melts are what give the jet-black, glossy coat on the pin with no tempering:
| Candy melts | Real chocolate | |
|---|---|---|
| What it is | Candy meltsSugar, vegetable fat, milk solids, color | Real chocolateCocoa butter, cocoa solids, sugar |
| Black color | Candy meltsJet black out of the bag | Real chocolateDark brown-black; needs black cocoa and oil-based color |
| Tempering | Candy meltsNot needed | Real chocolateNeeded for a snap and shine at room temperature |
| Sets in | Candy melts5 to 10 minutes at room temperature | Real chocolate10 to 20 minutes tempered; soft and streaky if not |
| Taste | Candy meltsSweet, mild | Real chocolateRicher, less sweet |
| Piping stripes | Candy meltsEasy; flows well from a fine tip | Real chocolateHarder; thickens quickly in the bag |
| Best for | Candy meltsThis recipe, kids, beginners | Real chocolateA grown-up, flavor-first version |
Black from real chocolate: melt 6 oz dark chocolate, stir in 1 tsp black cocoa powder mixed with 1 tsp melted coconut oil, then add oil-based black color a drop at a time. It sets softer than candy melts, so keep these somewhere cool.
Six Spooky Ways to Dip Strawberries for Halloween
The same dip, set and pipe method, six looks. Tap one:
Classic Striped Suit
The recipe above: a black coat, thin white vertical stripes and lime-green accents, finished with a white collar and a green bow tie. The look on the pin.
Red Bride Strawberries
Dip in red candy melts instead of black and let them set. Pipe white lace across the top: tiny scallops along the edge, a row of dots under them and a few fine loops down the front.
Sandworm Stripes
Dip in lime-green melts. Once set, hold each berry by the leaves and pipe purple bands around it every 1/4 inch from top to tip. A few white dots near the point look like teeth.
Tuxedo Strawberries
Dip in white melts and let set. Dip each side at an angle into the black to make the jacket, leaving a white V for the shirt front. Pipe a black bow tie and three black buttons.
Mummy Strawberries
Dip in white melts and let set, then pipe white lines back and forth across the berry for bandages, leaving a small gap near the top. Two black dots in the gap for eyes. The most forgiving one for kids.
Spider Strawberries
Dip in black, press the wet tip into black sanding sugar and lay the berry on the parchment. Pipe four bent black legs out from each side onto the paper and two white eyes with black dots. Lift once the legs set.
How Far Ahead to Make Them, and How to Store Them
Dipped strawberries are a same-day treat. This is the timeline that keeps them glossy:
| When | What to do | Notes |
|---|---|---|
| WhenThe day before | What to doBuy firm berries and keep them unwashed in the fridge on paper towels. Line trays, fill the piping bags | NotesWashed berries spoil faster |
| When2 to 3 hours before | What to doWash, pat dry and leave out on a towel | NotesAt least 1 hour to dry and lose the chill |
| WhenUp to 8 hours before | What to doDip, pipe and set | NotesThe best window for a party |
| WhenHolding | What to doCool room, below about 70°F, loosely covered on a paper-towel-lined tray | NotesNot airtight; trapped moisture softens the shell |
| WhenWarm room | What to doFridge, loosely covered; take out in a closed box 20 minutes before opening | NotesCondensation forms on the box, not the berries |
| WhenLeftovers | What to doFridge, on paper towels | NotesEat within 24 hours; the berries weep juice |
| WhenFreezer | What to doNot recommended | NotesThawed strawberries turn mushy and wet |
Why fridge strawberries sweat: a cold coating meets warm room air, and the moisture in that air condenses on it as beads of water. The water dissolves a little sugar, leaving dull streaks, and can make the stripes run. Room-temperature berries and a cool room avoid it.
Troubleshooting Chocolate Covered Strawberries
| Problem | Likely cause | Fix |
|---|---|---|
| ProblemBeads of water (sweating) | Likely causeCold berries, or chilled ones brought into a warm room | FixDip room-temperature berries; warm chilled ones in a closed box |
| ProblemCoating thick, grainy or clumped | Likely causeA drop of water, water-based color, or overheating | FixOverheated: stir in coconut oil. Water: melt a fresh batch |
| ProblemCracks in the shell | Likely causeCold berries expanding as they warm, or a thick coat | FixRoom-temperature berries; thin the coating |
| ProblemCoating slides off | Likely causeDamp berries | FixDry an hour on a towel; pat around the leaves |
| ProblemStreaky or gray coating | Likely causeUntempered chocolate, or coating too hot | FixCandy melts or tempered chocolate; let it cool a little |
| ProblemStripes thick or wobbly | Likely causeBag hole too big, or coating too cool | FixSnip 1/16 inch; rewarm the bag 10 seconds |
| ProblemStripes bleed into the black | Likely causePiped before the base set | FixWait until the black has set, 5 to 10 minutes |
| ProblemA puddle at the base | Likely causeExcess not dripped off | FixTwist, drip 5 seconds, scrape the tip on the rim |
How Many to Make, and What to Serve With Them
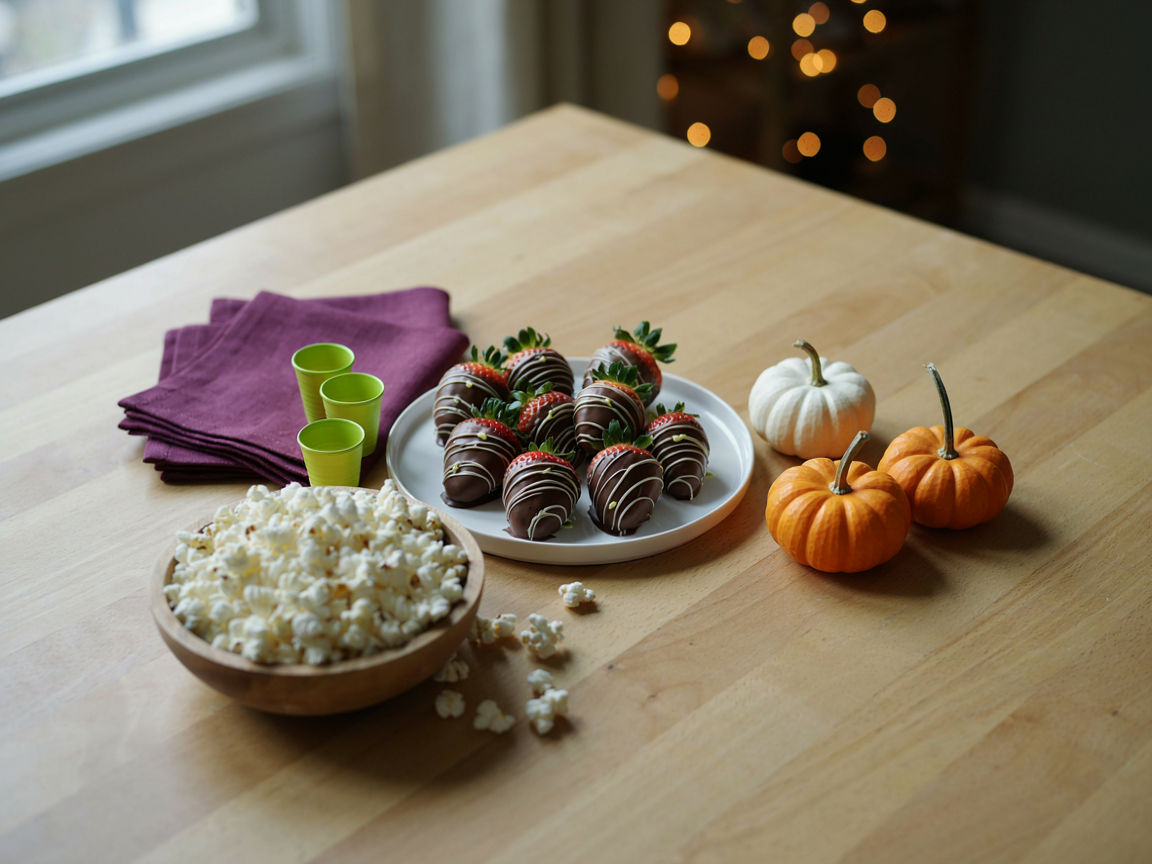
On the party table: a platter of striped strawberries with mini pumpkins, popcorn and purple napkins.
How many to make: 2 to 3 per guest on a table with other desserts, 4 if they are the only sweet. The card’s 24 serves 8 to 12. What to put next to them:
- Movie night: popcorn and a bowl of Halloween trail mix
- Something salty: sweet and salty Halloween snacks
- The whole spread: Halloween party food ideas
- A small gathering: small Halloween party food
- A kids’ party: kids Halloween food party ideas
- More creepy treats: creepy Halloween snacks
Nutrition (approximate, per dipped strawberry)
One large strawberry with about 11 g of coating and stripes; the melts left in the mug are not counted. Halal and gluten-free as written (check the labels on the melts and sanding sugar).
Beetlejuice Strawberries: FAQs
How do you make Beetlejuice strawberries?
Dip dry, room-temperature strawberries two thirds of the way into melted black candy melts, leaving the green tops and a band of red. Let them set 5 to 10 minutes, then pipe thin vertical white stripes and a few lime-green lines from a finely snipped bag. Set 15 minutes and serve the same day.
How far ahead can you make chocolate covered strawberries?
The same day is best: up to 8 hours ahead, held in a cool room. Overnight they still taste fine, but the berries start to weep juice and the shell softens. Wash and dry the berries only a few hours before dipping.
How do you make black chocolate for dipping?
Black candy melts are the easiest, already jet black. With real chocolate, melt dark chocolate, stir in black cocoa powder mixed with a little melted coconut oil, then add oil-based black color a drop at a time. Tinting white chocolate black takes a lot of color and usually ends up gray.
Why does chocolate seize when dipping strawberries?
Water got in: a damp strawberry, steam, a wet spoon or water-based food coloring turns melted chocolate thick and grainy in seconds. Overheating does the same. Melt in 20-second bursts at half power, keep everything dry and use only oil-based color.
How do you keep chocolate covered strawberries from sweating?
Dip completely dry, room-temperature berries and keep them in a cool room rather than the fridge. If they must be chilled, take them out in a closed container and wait 20 minutes before opening it, so the condensation forms on the box instead of the coating.
Do chocolate covered strawberries need to be refrigerated?
Not if they are eaten within about 8 hours and the room is cool, below about 70°F. In a warm room, or for leftovers, refrigerate them loosely covered on paper towels and expect a little sweating when they come out.
Candy melts or chocolate for dipping strawberries?
Candy melts for this recipe: they come jet black and lime green, need no tempering, and set hard and glossy at room temperature in minutes. Real chocolate tastes richer but must be tempered to set firm without the fridge, and it is never truly black on its own.
How many chocolate covered strawberries per person?
Two to three per guest on a dessert table with other treats, and four if they are the main sweet. Twenty-four serves 8 to 12 people; the card scales up to 48 for a big party.
Can you use frozen strawberries for chocolate covered strawberries?
No. Thawed strawberries are soft and wet and keep releasing juice, so the coating seizes, slides off and never sets properly. Use fresh, firm, large berries with green tops.
How do you pipe thin stripes on strawberries?
Melt white candy melts in a piping bag or zip-top bag, snip the very tip, about 1/16 inch, and pipe onto a base that has already set. Hold the bag just above the berry and pull each line from top to tip in one steady movement.
Can you color white chocolate lime green?
Yes, with oil-based (candy) coloring only; water-based gels make it seize. Start with a drop of yellow and a drop of green for a bright lime, stir well and add more slowly. Pre-colored lime-green candy melts skip the step.
Why does chocolate crack on strawberries?
The berries were cold. As they warm up they expand slightly and crack the set shell, and a thick coating cracks more easily. Let washed berries sit at room temperature for an hour, and thin the coating with a little coconut oil.
How long do chocolate covered strawberries last?
They are best within 8 hours and keep up to 24 hours in the fridge on paper towels. After that the berries soften and weep juice under the shell. They do not freeze well.
Can kids help make Beetlejuice strawberries?
Yes. Children can dip, holding the leaves, and pipe dots and stripes once the coating has cooled a little; an adult should do the microwaving. Common candy melts contain no gelatin or alcohol, so the recipe is halal as written; check sprinkle labels.
Save the pin so the recipe, the six looks and the make-ahead timeline are one tap away.
More Halloween Sweets
Desserts, monster donuts, spider cookies, party cups, a snack board and treats for grown-ups.
Spooky Halloween Desserts
More sweets for the Halloween table. See the desserts → MonsterMonster Donuts With Teeth
A grinning treat for the party. See the recipe → SpidersSpider Cookies
Eight legs, no oven skills needed. See the recipe → Party CupsDessert Charcuterie Cups
Single-serve sweets for a crowd. See the cups → BoardsHalloween Charcuterie Board
A whole board of spooky snacks. See the board → Grown-upsSpooky Snacks for Adults
For the movie night crowd. See the snacks →Dry berries, a thin black coat, thread-thin stripes. Forty-five minutes, and the most-photographed plate on the Halloween table.
Pin these Beetlejuice strawberries for the party.

