
DIY Blackstone Grill Station in Your Backyard: Step-by-Step Guide
A slatted cedar prep counter with a fold-out shelf, tool rail, spice shelf and firewood cubby, parked beside the griddle’s own cart with the clearance its manual asks for.
- Two weekends
- $460 to $800
- Intermediate skill
- 48 × 24-inch footprint
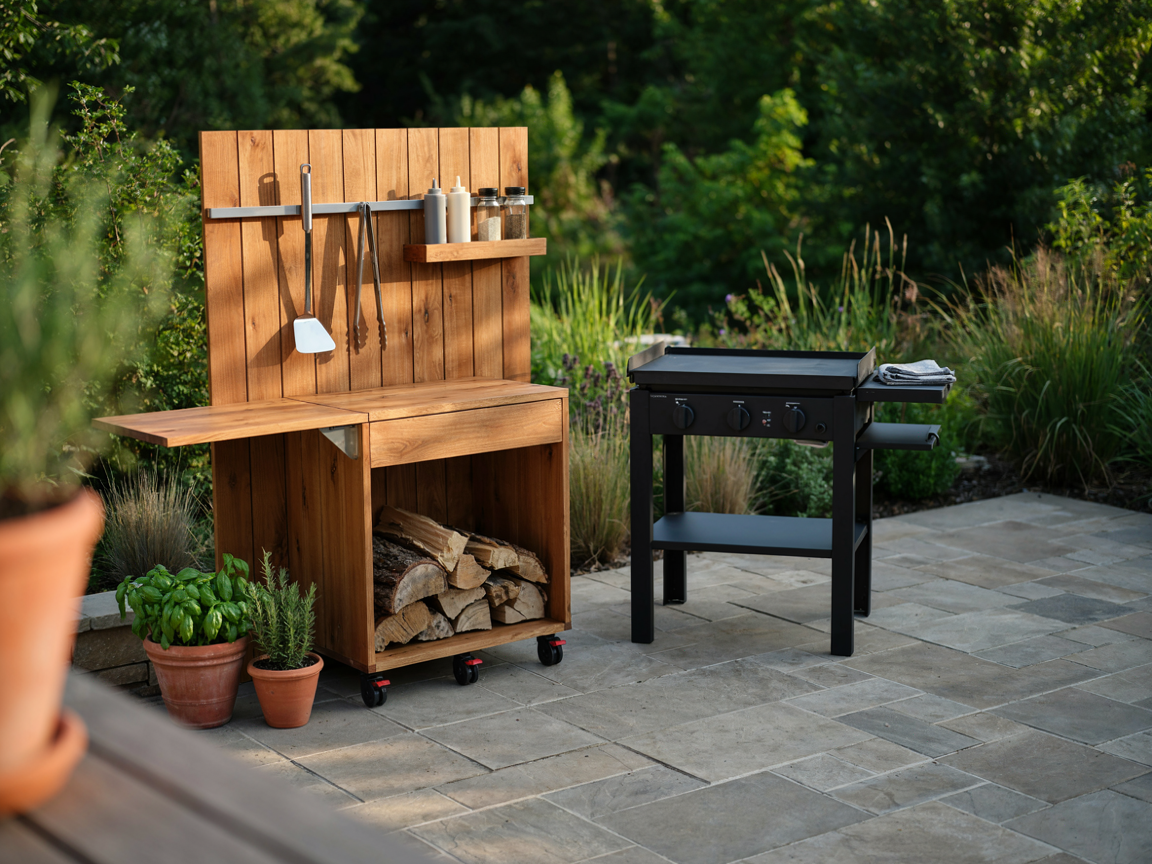
The setup from the pin, laid out safely: the cedar station on stone pavers, the griddle on its own cart about a metre to the right.
A DIY Blackstone grill station turns a bare patio corner into an outdoor kitchen: a slatted cedar counter for prep, a rail for every spatula and a shelf for the spices, with the griddle rolled up alongside. The griddle keeps its own cart, a safe 36 inches away, because that is what its manual asks for.
In this post:
- The build plan at a glance
- Safety, clearance and patio size
- One honest cost estimate
- Which wood to use
- Buying list, cut list, hardware and tools
- 13 build steps and a weekend schedule
- Feature ideas, mistakes and finishing
- What to cook first, and 14 FAQs
Why Build a Cedar Prep Station Beside the Griddle
A counter the griddle never had
Burgers, buns, toppings and tools all need a landing spot, and a griddle’s side shelves fill up fast. A 48-inch cedar counter one step away holds the whole prep line, with a fold-out shelf for overflow.
The pin’s look, laid out safely
The slatted cedar, the tool rail, the spice shelf and the firewood cubby all stay. The difference: the griddle keeps its own steel cart and parks beside the station, with the 36 inches of open air its manual asks for.
Built to your height and patio
The counter is 36 inches by default, the legs change for a taller cook, and the station rolls on locking casters so it can move for cleaning or winter.
Cedar takes the weather
Western red cedar’s natural oils resist rot and insects, thin slats stay straight, and a coat of oil each spring keeps the warm color. Budget about $460 to $800 for the whole station.
Still choosing the cooker itself? The griddle versus grill guide compares the two for flavour, cleanup and what each does best.
The DIY Blackstone Grill Station Build Plan
The plan is drawn for a 36-inch griddle and works for a 28-inch one too. Every number below matches the cut list and the cost table.
The Cedar Prep Station
The station from the pin, drawn as a freestanding piece: a slatted cedar counter with a fold-out shelf, tool rail, spice shelf, firewood cubby and locking casters. The griddle stays on its own steel cart, parked alongside with 36 inches of open air between them.
What You Are Building
- 48 × 24 in cedar counter at 36 in, four 2×6 boards with drainage gaps
- 60 in slatted back wall with a stainless tool rail and a spice shelf
- 18 × 17 in fold-out shelf on the end away from the griddle
- 14 in firewood cubby and an open storage bay with a trash-bag hook
- 4 locking casters on cedar skids; a paper towel peg on the back leg
Where It Goes
- 36 in (1 m) minimum from the griddle’s sides and back to any wood, per its manual
- Pavers stone or concrete, at ground level, with open sky overhead
- Tank stays in the holder on the griddle’s own cart; no propane in the station
Griddle Safety: Clearance, Propane and Placement
The pin shows the griddle snug against the cedar. It makes a lovely photo, but the Blackstone owner’s manual for model 2152 asks for more room than that, so this plan keeps the two apart. Here is what the manual says, and how the layout follows it.
| What the manual says (model 2152) | How this plan follows it |
|---|---|
| What the manual says (model 2152)Keep at least 36 in (1 m) clear at the sides and back of the griddle | How this plan follows itThe cedar station parks at least 36 in from the griddle’s outermost edge, side shelf included. Fences, walls and plants stay 36 in away too. |
| What the manual says (model 2152)Do not use it under overhead combustible construction | How this plan follows itOpen sky over the griddle: no pergola, roof, awning or low branches. The station does not get a roof either. |
| What the manual says (model 2152)Do not use it on or under an apartment or condominium balcony or deck | How this plan follows itBoth pieces sit on a ground-level patio of stone or concrete pavers. |
| What the manual says (model 2152)Spare cylinders: never under or near the griddle, never in a garage or enclosed space | How this plan follows itThe connected tank stays in its holder on the griddle’s own cart. No propane lives in the station, and no hose runs through wood. |
| What the manual says (model 2152)Outdoors only, in a well-ventilated area | How this plan follows itNothing encloses the griddle: no walls, no cabinet, no lid built over it. |
Check your own model’s manual before you build. Clearances can differ between models and countries, and local fire rules may ask for more. The model number is on the griddle’s rating label.
28-Inch vs 36-Inch Griddle: How Much Room You Need
| 28-inch griddle | 36-inch griddle | |
|---|---|---|
| Cooking surface | 28-inch griddleAbout 520 sq in | 36-inch griddleAbout 720 sq in |
| Cart footprint, side shelves open | 28-inch griddleAbout 45 × 20 in | 36-inch griddleAbout 62 × 22 in |
| Station width that suits it | 28-inch griddle36 to 48 in | 36-inch griddle48 in, as drawn here |
| Patio run: station, 36 in gap, cart | 28-inch griddleAbout 10 to 11 ft | 36-inch griddleAbout 12 ft |
| Patio depth: cart, 36 in behind, room to stand | 28-inch griddleAbout 8 ft | 36-inch griddleAbout 8 ft |
| Best for | 28-inch griddleCouples and small families | 36-inch griddleCookouts and bigger crowds |
Measure your own cart with the side shelves open: hood, XL and four-burner versions run wider. The patio run includes the 36-inch gap; add another 36 inches beyond the griddle if a fence or wall is there.
What It Costs to Build
One estimate, built from the buying list below. Prices vary by region and season, so treat these as ranges, not quotes.
| Part of the build | What it covers | Estimate |
|---|---|---|
| Part of the buildLumber | What it coversCedar: 2 4x4s, 2 2x6s, 4 2x4s, 16 1x4s, 1 1×6, as in the buying list | Estimate$265 to $440 |
| Part of the buildHardware | What it covers4 locking casters (counted here, once), lag and deck screws, 16 brackets, piano hinge, 2 folding brackets, tool rail and hooks, spice-shelf brackets, dowel and hooks | Estimate$155 to $290 |
| Part of the buildFinish | What it coversPenetrating exterior oil (1 quart to ½ gallon), sandpaper in 80, 120 and 180 grit, rags, brushes and gloves | Estimate$40 to $70 |
| Part of the buildThe station as drawn | What it coversEverything above: frame, counter, slats, fold-out shelf, firewood cubby, casters, tool rail, spice shelf, towel peg and trash hooks | Estimateabout $460 to $800 |
| Part of the buildOptional add-ons | What it coversWarm-white LED strip ($15 to $30), butcher-block board ($30 to $60), fitted cover ($25 to $60), magnetic tool bar ($15 to $25) | Estimate$0 to about $175 |
Casters are counted once, in hardware. Swapping cedar for pressure-treated pine lowers the lumber line a good deal but adds sealing work. Buy all the lumber in one trip, sight down each board for twist, and ask your lumber yard or hardware store whether they will make the long cuts so everything fits in the car.
Choosing the Wood
The wood decides how long the station lasts, how much care it needs and how it looks after a few summers. The pin, the cut list and the cost table all use western red cedar.
| Wood | Outdoors | Working it | Cost |
|---|---|---|---|
| WoodWestern red cedar (the pin’s wood) | OutdoorsNatural oils resist rot and insects; warm red-brown, silvers if left bare | Working itLight and stable; cuts and screws easily; pre-drill near the ends | CostMid |
| WoodRedwood | OutdoorsSimilar resistance, often tighter grain; the richest red | Working itHeavier; splits like cedar if not pre-drilled | CostPremium |
| WoodPressure-treated pine | OutdoorsTreated against rot; greenish until stained, needs sealing | Working itHeavy, can twist and check; wear a mask, never burn offcuts | CostLowest |
| WoodTeak | OutdoorsThe most weather-proof of the six; honey-gold, silvers gracefully | Working itDense; dulls blades and bits | CostHighest |
| WoodWhite oak | OutdoorsClosed grain resists moisture; strong grain pattern | Working itHard and heavy; needs sharp bits | CostMid to high |
| WoodComposite decking | OutdoorsNo rot, no oiling; less natural up close | Working itHeavy; needs its own fasteners and closer supports | CostMid to high |
Composite boards can replace the counter and shelves on a cedar frame if you never want to oil them; they need closer supports than wood.
Materials, Cut List and Tools
The frame is 46½ × 22½ inches outside the legs. Slats add ¾ inch at each end and the back, and the counter overhangs ¾ inch at the front: 48 × 24 overall.
Heights: 5-inch casters, a 1½-inch skid, 28-inch front legs and a 1½-inch counter make 36 inches; the 53½-inch back legs carry the wall to 60.
Lumber to Buy
| Board | Buy | Cut from each board |
|---|---|---|
| BoardCedar 4×4, 8 ft | Buy2 | Cut from each boardOne front leg A (28 in) and one back leg B (53½ in) from each, with about 14 in spare |
| BoardCedar 2×6, 10 ft | Buy2 | Cut from each boardTwo counter boards H (48 in) and one skid C (22½ in) from each; pick straight, full-length boards |
| BoardCedar 2×4, 8 ft | Buy4 (3 + 1 spare) | Cut from each boardBoards 1 and 2: D, D, E. Board 3: E, E, F, F, G |
| BoardCedar 1×4, 8 ft | Buy16 (14 + 2 spare) | Cut from each boardSix boards: I, I. One: I, J, J. Three: J × 4. Two: K × 4. One: K, L, L, L. One: L, L, N, N |
| BoardCedar 1×6, 8 ft | Buy1 | Cut from each boardThree shelf boards M (18 in) and the spice shelf O (24 in) |
Cut List
| Part | Lumber | Cut length | Qty |
|---|---|---|---|
| PartA. Front legs | Lumber4×4 | Cut length28 in | Qty2 |
| PartB. Back legs | Lumber4×4 | Cut length53½ in | Qty2 |
| PartC. Caster skids | Lumber2×6 | Cut length22½ in | Qty2 |
| PartD. Long aprons, front and back, top and bottom | Lumber2×4 | Cut length39½ in | Qty4 |
| PartE. Side aprons, top and bottom | Lumber2×4 | Cut length15½ in | Qty4 |
| PartF. Counter brace and divider cleat | Lumber2×4 | Cut length19½ in | Qty2 |
| PartG. Back-wall stile | Lumber2×4 | Cut length24 in | Qty1 |
| PartH. Countertop boards (back one notched 4¼ × 3½ in at each end) | Lumber2×6 | Cut length48 in | Qty4 |
| PartI. Back slats: 6 above the counter, 7 below | Lumber1×4 | Cut length46½ in | Qty13 |
| PartJ. Side slats: 7 at each end | Lumber1×4 | Cut length23¼ in | Qty14 |
| PartK. Lower shelf boards | Lumber1×4 | Cut length22½ in | Qty9 |
| PartL. Divider slats (firewood cubby) | Lumber1×4 | Cut length23¾ in | Qty5 |
| PartM. Fold-out shelf boards | Lumber1×6 | Cut length18 in | Qty3 |
| PartN. Fold-out shelf battens | Lumber1×4 | Cut length15 in | Qty2 |
| PartO. Spice shelf | Lumber1×6 | Cut length24 in | Qty1 |
Lengths assume 1x4s are 3½ inches wide and ¾ inch thick. Cedar 1x boards vary a little, so set the slat gaps by eye and the spacer, not by arithmetic.
Hardware
| Item | Spec | Qty |
|---|---|---|
| ItemLocking plate casters | Spec4-in wheel, about 5 in tall, rated 250 lb or more each | Qty4 |
| ItemLag screws with washers | Spec5/16 × 2½ in, for the casters | Qty16 |
| ItemExterior structural screws | Spec3 in for the frame, 3½ in for skids into legs | Qtyabout 60 |
| ItemStainless deck screws | Spec1¼ in, for slats, shelves and brackets | Qtyabout 250 |
| ItemStainless corner brackets | Spec2 in L-brackets, frame corners and counter | Qty16 |
| ItemStainless piano hinge | Spec18 in, for the fold-out shelf | Qty1 |
| ItemLocking folding shelf brackets | Specabout 12 in, heavy duty | Qty2 |
| ItemStainless tool rail and S-hooks | Spec24 to 30 in rail, 8 hooks | Qty1 set |
| ItemSmall shelf brackets | Specfor the spice shelf | Qty2 |
| ItemHardwood dowel and screw hooks | Spec1 in dowel, 12 in long (towel peg); 2 hooks (trash bag) | Qty1 + 2 |
Tools
Essential
- Circular saw or miter saw
- Jigsaw, for the counter notches
- Cordless drill and driver bits
- Countersink and pilot bits
- Tape measure and speed square
- 4-foot level
- Four bar clamps
- Safety glasses and hearing protection
Strongly recommended
- Random orbit sander
- Impact driver, for the lag screws
- Pair of sawhorses
- Pocket-hole jig
- 1-inch spade or Forstner bit, for the towel peg
Nice to have
- Brad nailer, to hold slats while screwing
- Router with a round-over bit
- Table saw, for ripping a spacer
- Laser level
- Exterior wood glue
No miter saw? Most hardware stores rent tools by the day. Rent it for the cutting Saturday and cut the whole list in one go.
How to Build a DIY Blackstone Grill Station, Step by Step
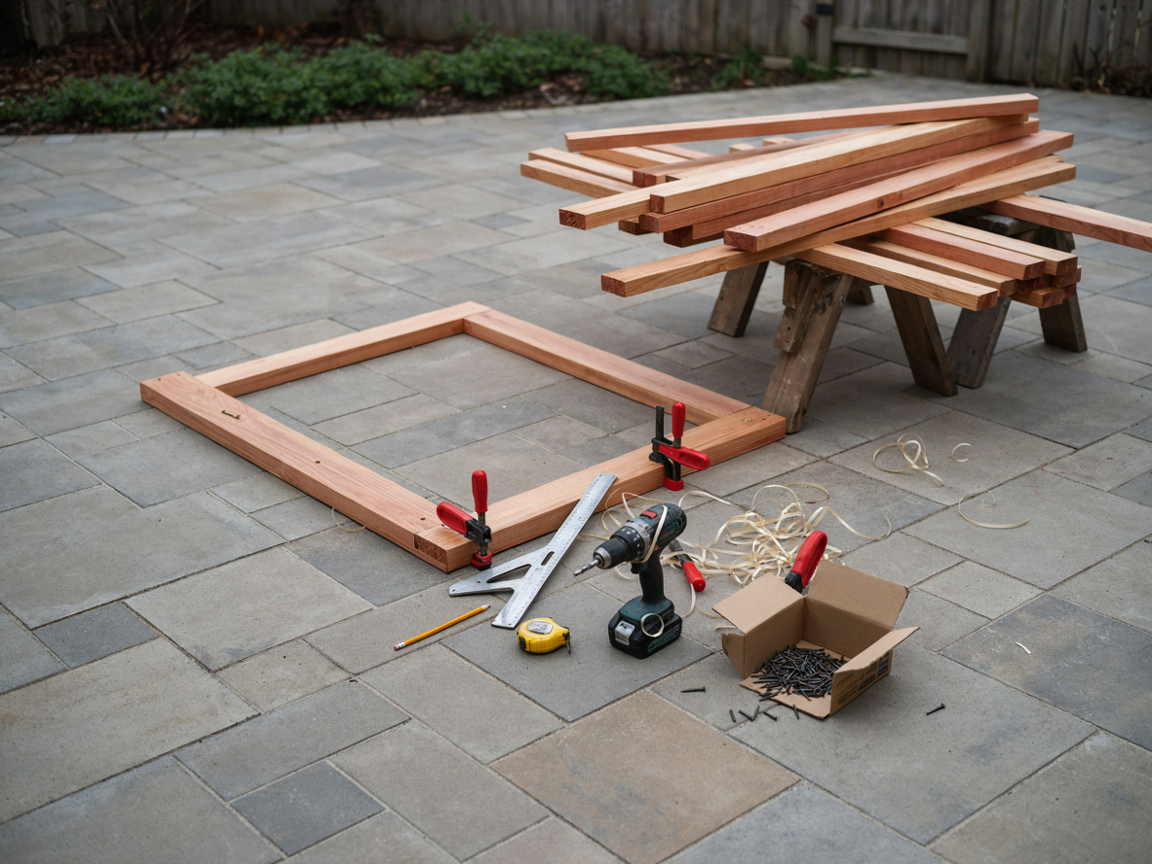
Weekend one: cedar slats and frame pieces on sawhorses, the base frame squared up with corner brackets.
Thirteen steps, in order. Letters match the cut list. Pre-drill every screw in cedar, and keep the ½-inch spacer in your pocket.
Pick the spot and check the clearances
Before you buy · 30 minutes
Choose a level, ground-level patio of stone or concrete pavers with open sky above. Park the griddle on its cart, then mark where the station goes: at least 36 inches from the griddle’s outermost edge, side shelf included.
Keep 36 inches behind the griddle and on its other side, clear of fences, walls and shrubs. Read your own model’s manual and adjust if it asks for more.
Buy, stack and cut the lumber
Weekend 1 · about 3 hours
Buy kiln-dried cedar, or stack it flat with spacers for two to four weeks so it stops moving. Cut every piece on the cut list, using a stop block for the four legs so each pair matches exactly.
Pencil each part’s letter on its end. Notch the back counter board 4¼ × 3½ inches at both ends with a jigsaw.
Build the two side frames
Weekend 1 · about 1 hour
Lay one front leg A and one back leg B on the floor, 15½ inches apart, bottoms lined up. Fit a side apron E flush with the top of the front leg and another flush with the bottom of both legs.
Pre-drill, drive two 3-inch screws per joint, add a corner bracket inside the top joint, and repeat for the other end.
Join the frames and square them
Weekend 1 · about 2 hours, two people
Stand the side frames up and join them with the four long aprons D, front and back, top and bottom, flush with the outside faces of the legs. One person holds each leg plumb while the other drives screws.
Measure corner to corner both ways; when the diagonals match, the frame is square. Add the remaining corner brackets.
Fit the skids and casters
Weekend 1 · about 1 hour
Turn the frame upside down. Screw a skid C under each pair of legs, flush with the outside, with two pre-drilled 3½-inch screws up into each leg.
Lag-screw a caster under each leg position, the locking ones at the front where a foot can reach them. Turn the frame back over and lock the wheels.
Lower shelf, brace and firewood cubby
Weekend 1 · about 2 hours
Lay the nine shelf boards K across the bottom aprons, 1 inch apart so bark and water fall through. Fix the brace F between the top aprons, 14 inches from the left leg; set the cleat F on the shelf directly below it.
Screw the five divider slats L to the brace and cleat, ½ inch apart. The 14-inch bay is the firewood cubby.
Slat the base
Weekend 1 · about 2 hours
Cut a ½-inch spacer from scrap. Starting flush with the bottom of the legs, screw seven back slats I across the back legs and seven side slats J at each end, two pre-drilled screws at every leg.
Side slats run past the back legs to cover the ends of the back slats. The top slat stops ½ inch below the counter.
Lay the countertop
Weekend 2 · about 1 hour
Set the notched board H at the back around the back legs, then the other three, about ⅜ inch apart, with a ¾-inch overhang at the front and flush with the side slats.
Fix them from below through corner brackets on the aprons, so no screw heads show on top. Sand the counter now while it is easy to reach.
Raise the back wall
Weekend 2 · about 1½ hours
Stand the stile G on the counter’s back edge, centred, its back flush with the back legs. Screw the six upper back slats I to the legs and stile, the first one ½ inch above the counter so water drains out behind.
With ½-inch gaps, the top slat finishes flush with the tops of the back legs, 60 inches up.
Hang the fold-out shelf
Weekend 2 · about 1½ hours
Screw the three shelf boards M across the two battens N, ¼ inch apart. Fix the piano hinge under the counter’s left end, the end away from the griddle, so opening it never shortens the gap.
Mount the two folding brackets through the slats into the legs. Test with about 40 pounds before trusting it with a loaded tray.
Add the features
Weekend 2 · about 1 hour
Screw the tool rail across the back wall into the stile and legs, and hang the S-hooks. Set the spice shelf O on two brackets at the upper right. Drill a 1-inch hole 1½ inches deep in the left back leg and glue in the dowel for paper towels.
Twist two hooks inside the right-hand bay for a trash bag.
Sand and oil
Weekend 2 · about 3 hours, plus drying
Sand every face to 120 grit and the counter to 180, rounding the edges. Wipe on penetrating exterior oil, let it soak for 15 minutes, then wipe off whatever is left on the surface.
Give a second coat the next dry day, and an extra coat on the counter.
Park it and cook
The first evening · about 30 minutes
Roll the station into its spot, lock the casters and re-measure the 36 inches to the griddle. The griddle stays on its own cart, the tank in its holder.
Lay out the toppings, hang the tools, light the griddle and cook.
The Weekend-by-Weekend Schedule
About 20 working hours over two weekends, with the shopping done the week before. First-time builders should add a few hours.
| When | Jobs | Time |
|---|---|---|
| WhenThe week before | JobsPick the spot and measure the clearances; buy the lumber and stack it flat with spacers; order casters, hinge and brackets | TimeAbout 2 hours |
| WhenWeekend 1, Saturday | JobsCut everything on the cut list; build both side frames; join them with the long aprons; check square | TimeAbout 6 hours |
| WhenWeekend 1, Sunday | JobsSkids and casters; lower shelf, brace and firewood divider; slat the base back and ends | TimeAbout 5 hours |
| WhenWeekend 2, Saturday | JobsCountertop, stile and back wall; fold-out shelf; tool rail, spice shelf, towel peg and hooks | TimeAbout 5 hours |
| WhenWeekend 2, Sunday | JobsSand everything; first coat of oil, wipe off; second coat the next dry day | TimeAbout 3 hours, plus drying |
| WhenFirst evening after | JobsRoll it into place, lock the casters, re-measure the 36 in gap; season the griddle if it is new; first cook | TimeAbout 1 hour |
The one thing not to rush is the oil: it needs a dry day, and the second coat goes on after the first has soaked in overnight.
Feature Ideas for the Station
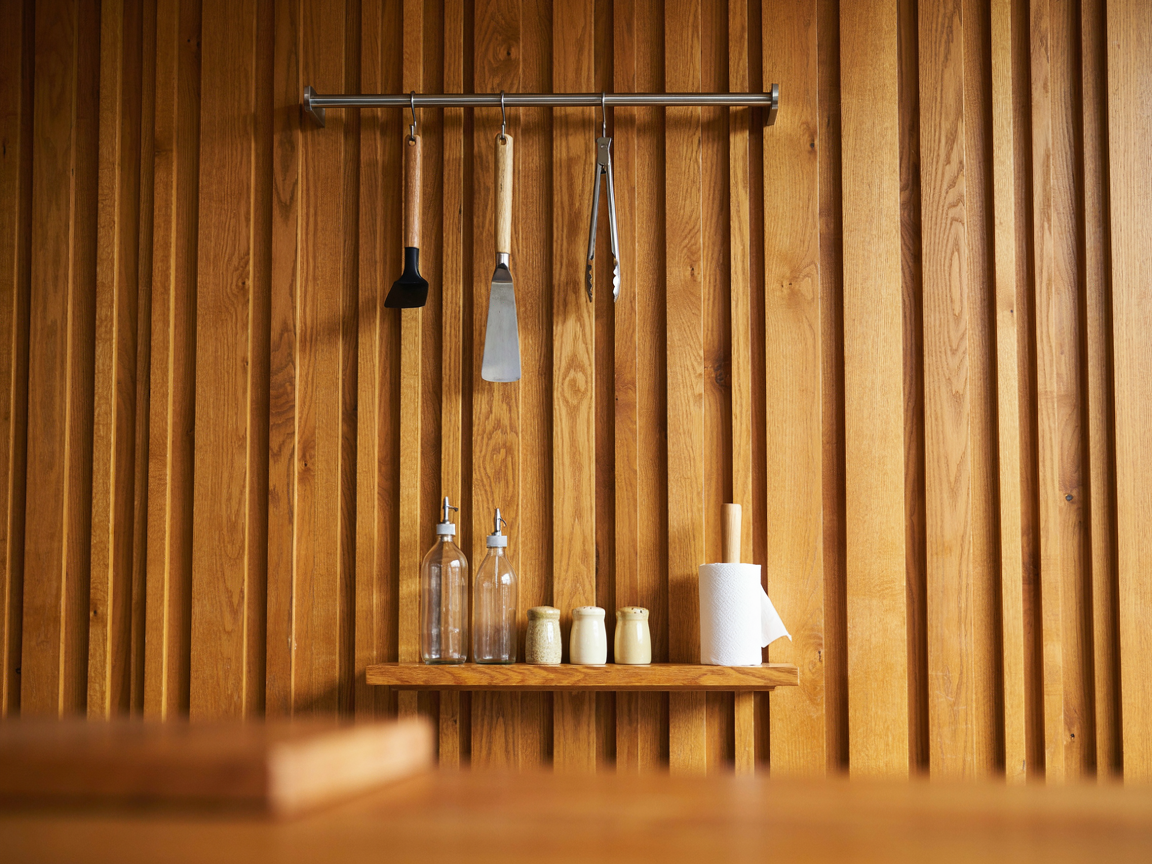
Up close: the slatted cedar back wall, the stainless tool rail and the little spice shelf.
All eight are in the cut list and the cost table, except the LED strip, which is an optional add-on.
Fold-out prep shelf
Hinged on the end away from the griddle, it adds an 18 × 17-inch landing spot for a sheet tray and folds flat against the side when not needed. Two locking brackets hold it level. About 1½ hours.
Tool rail
A stainless rail across the back wall with S-hooks for the spatulas, scraper and tongs, all at eye level and one reach away. Screw it into the stile and legs, not just the slats. About 20 minutes.
Spice shelf
A 24-inch cedar 1×6 on two small brackets, upper right of the back wall, as on the pin. Salt, pepper, seasoning shakers and squeeze bottles stay off the counter. About 30 minutes.
Firewood cubby
The 14-inch bay behind the slatted divider holds firewood for the fire pit, kept dry by the counter above and aired by the gaps. Like everything in the station, it sits well clear of the griddle. Built in with the shelf.
Paper towel peg
A 12-inch hardwood dowel glued into the left back leg. A roll slides on and off in a second, and the most-reached-for item at any cookout stays within arm’s length. About 15 minutes.
Trash bag hook
Two screw-in hooks inside the right-hand bay hold a kitchen bag open while you cook, so scraps go straight in and the counter stays clear. About 5 minutes.
LED strip lights
A warm-white strip under the spice shelf or along the top slat for evening prep. Battery or solar strips need no wiring; anything that plugs in should be rated for outdoor use, on a GFCI outlet, with the cord kept well away from the griddle.
Locking casters
Four 4-inch casters rated 250 pounds or more each let the station roll into the garage for winter. Lock them before cooking, and re-measure the gap to the griddle whenever it moves.
Common Build Mistakes and Pro Tips
Building the griddle into the wood
It looks neat in photos, but the manual asks for 36 inches of clearance at the sides and back, which no built-in cut-out can give. Keep the griddle on its cart and build the station beside it.
Measuring the gap from the wrong place
Measure from the griddle’s outermost edge, side shelf included, to the nearest wood. Re-check whenever either piece rolls, and keep the fold-out shelf on the far end.
Using wet or green lumber
Fresh lumber shrinks, twists and bows as it dries, and one bent slat spoils the whole back wall. Buy kiln-dried, or stack it flat with spacers for a few weeks first.
Light-duty casters
A station loaded with firewood is heavy, and cheap casters buckle. Choose 4-inch casters rated 250 pounds or more each, with locks on at least the front pair.
Plain steel screws
They rust within a season, and cedar’s tannins react with plain steel to leave dark streaks. Use stainless steel screws, brackets and hinges throughout.
Skipping the finish
Bare cedar turns grey in one season and starts to check. The oil takes an afternoon and decides how the station looks for years, so do it before the first cook.
Pro Tips for a Clean Finish
- Write the length on the board, check it against the cut list, then cut. Cedar is too dear to eyeball.
- Pre-drill everything, especially within 3 inches of an end; cedar splits along the grain.
- Design for water: gaps between counter boards, a drain gap behind, and a slope of about ⅛ inch per foot to the front if the patio allows.
- Make a story stick: a scrap marked with every slat height, so all four sides match without re-measuring.
- One spacer for every gap: a ½-inch offcut makes the slats look machine-made.
- Photograph each stage; later repairs are easier when you can see what sits behind the slats.
Finishing, Maintenance and Winter Care
Penetrating oil soaks into the wood rather than sitting on top, so it cannot peel or blister the way a film finish does on a sunny horizontal surface.
| Job | How | When |
|---|---|---|
| JobSand | How80 grit on rough spots, 120 everywhere, 180 on the counter; round over every edge | WhenBefore any oil |
| JobOil | HowPenetrating exterior wood oil by rag or brush; wipe off the excess after 15 minutes; second coat 24 hours later | WhenA dry day, 50 to 85°F |
| JobCounter | HowOne extra coat of the same oil. Food goes on a board or sheet tray, not straight on the wood | WhenWith the rest |
| JobClean | HowWarm soapy water and a soft brush, rinse, let it dry; no pressure washer up close, it raises the grain | WhenAfter cooks |
| JobRe-oil | HowA light sand where it looks dry, then one coat | WhenEvery spring; twice a year in strong sun |
| JobCheck | HowTighten screws, test the caster locks and the folding brackets | WhenEvery spring |
Winter Care
| What to do | When | |
|---|---|---|
| Mild winters | What to doA breathable fitted cover, casters locked on the pavers, a fresh coat of oil before the cold | WhenRe-oil in spring |
| Freeze-thaw winters | What to doRoll the station into a garage or shed. It holds no fuel, so indoors is fine for the wood | WhenBack out when it thaws |
| The griddle | What to doFollow its manual: tank disconnected and kept outdoors, never in the garage; cooktop cleaned, oiled and covered | WhenEvery time it is stored |
| Snow | What to doBrush it off the counter and shelves; do not let it sit and melt into the slats | WhenAfter each fall |
The griddle needs its own winter routine; the guide to whether a Blackstone griddle will rust covers seasoning, covers and storage.
What to Cook First on the New Setup
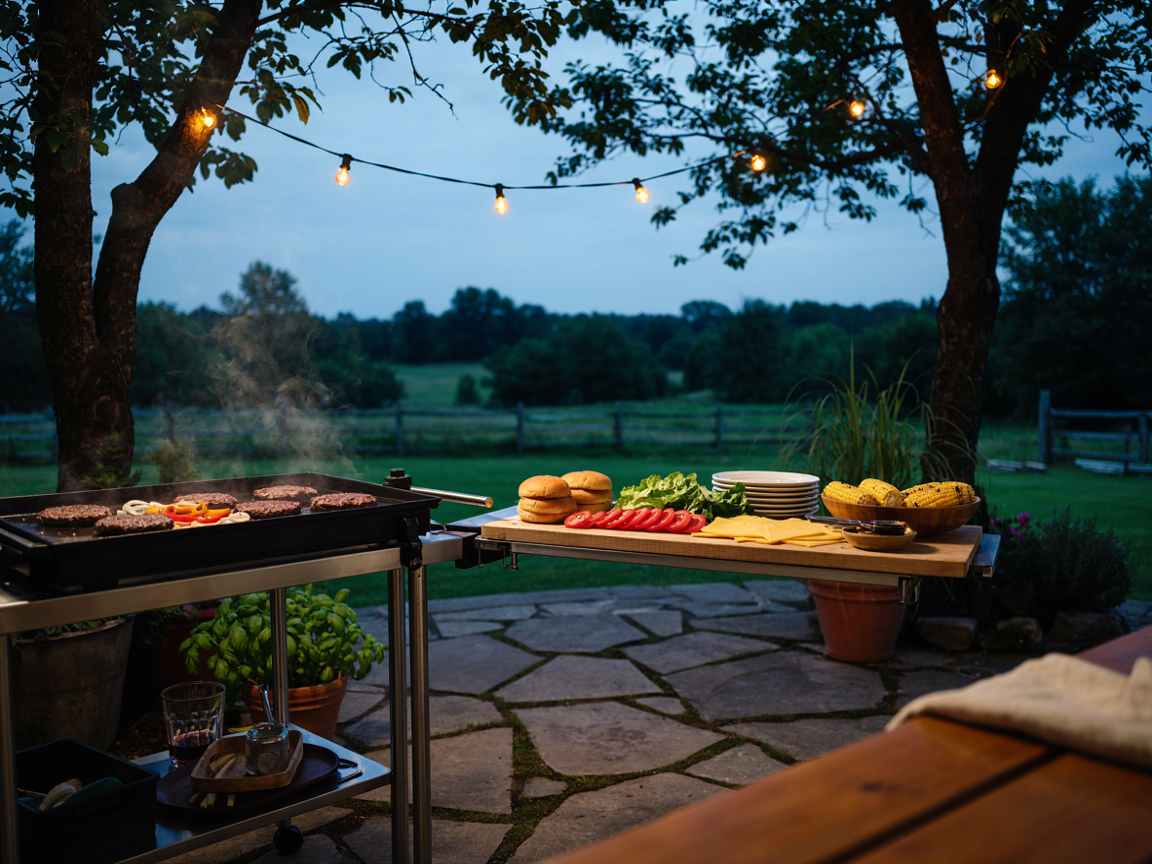
First cookout: smash burgers and peppers on the griddle, toppings laid out on the prep table.
Three good first cooks that use every inch of the counter:
- Smash burgers, the classic first cook: juicy turkey burgers
- Burgers and burritos in one: cheeseburger burritos
- The weekend breakfast: breakfast burrito ideas
How the Station and Griddle Work Together
| At the station | At the griddle | |
|---|---|---|
| Before lighting | At the stationToppings, buns, sauces and foil laid out; tools on the rail | At the griddleSeasoned, tank checked, sheet tray on the side shelf |
| Cooking | At the stationAssemble, stage the next batch, keep raw and cooked on separate boards | At the griddlePatties and peppers on the flat top |
| Serving | At the stationBuild the burgers or burritos on the counter | At the griddleHeat off |
| Cleanup | At the stationTrash bag on the hook, wipe down, cover | At the griddleScraped while warm, then a thin coat of oil |
Keep raw meat on its own board at the station and carry it over on a sheet tray; the cooked burgers come back on a clean one. Halal beef or turkey works for every recipe above.
DIY Blackstone Grill Station: FAQs
How far should a Blackstone griddle be from a wood grill station?
At least 36 inches (1 m) at the sides and back, if your model’s manual matches the one for model 2152. Measure from the griddle’s outermost edge, side shelf included, to the nearest wood. Local fire rules can ask for more, so check them too.
Can you build a Blackstone griddle into a wooden table?
Not by the manual. The owner’s manual for model 2152 asks for 36 inches of clearance at the sides and back, so a griddle set into a cedar counter breaks the rule however you shield it. Keep the griddle on its own steel cart and build the wood station beside it.
Can you put a Blackstone under a pergola or covered patio?
Not under anything that can burn. The manual says not to use it under overhead combustible construction, which covers wooden pergolas, most patio roofs and awnings. It is an outdoor-only appliance for well-ventilated areas, so cook under open sky and away from low branches.
Can you use a Blackstone on a wood deck?
The manual for model 2152 rules out using it on or under any apartment or condominium balcony or deck. For a house deck, check your own model’s manual and local fire rules. This plan sidesteps the question: griddle and station both sit on a ground-level paver patio.
Where does the propane tank go on a Blackstone grill station?
In the holder on the griddle’s own cart, connected the way its manual shows. Not inside the cedar station, and no hose through the wood. Spare cylinders stay outdoors, away from the griddle, and never in a garage or shed.
How much does it cost to build a DIY Blackstone grill station?
About $460 to $800 in materials for the 48-inch cedar station here: $265 to $440 of lumber, $155 to $290 of hardware including the casters, and $40 to $70 of finish. Prices vary by region and season; pressure-treated pine lowers the lumber line.
What size grill station do I need for a 36-inch Blackstone?
A 48-inch station suits a 36-inch griddle, whose cart is about 62 inches wide with the shelves open. With the 36-inch gap, plan about 12 feet of patio in a line and about 8 feet of depth. A 28-inch griddle needs about 10 to 11 feet.
What is the best wood for an outdoor grill station?
Western red cedar: naturally rot and insect resistant, light, stable and easy to screw. Redwood looks richer for more money, teak lasts longest for far more, and pressure-treated pine is cheapest but needs sealing. Composite decking suits shelves if you never want to oil.
How long does it take to build an outdoor grill station?
Two weekends, about 20 working hours: cutting and framing the first weekend, then counter, back wall, shelf, features and finish the second. First-time builders should allow a few extra hours, and the oil needs a dry day between coats.
How tall should an outdoor prep station be?
36 inches, standard kitchen counter height, suits most cooks. For a taller cook, add the same amount to the front and back legs, parts A and B. If your casters are taller or shorter than 5 inches, change both legs by the difference.
Should a grill station have wheels?
Locking casters make it easy to roll the station into the garage for winter and back to the right spot. Use 4-inch casters rated 250 pounds or more each, lock them before cooking, and re-check the 36-inch gap each time. Levelling feet suit uneven ground.
How do you seal a cedar grill station?
Sand to 120 grit, 180 on the counter, then wipe on a penetrating exterior oil, let it soak 15 minutes and wipe off the excess. Add a second coat the next dry day and re-oil every spring. Film finishes tend to peel outdoors.
How do you protect an outdoor grill station in winter?
In mild winters, a breathable fitted cover and a fresh coat of oil before the cold. In freeze-thaw climates, roll it into a garage or shed; the station holds no fuel. The griddle’s propane tank always stays outdoors, disconnected.
What should I cook first on a new Blackstone?
Season the cooktop as its manual describes, then start with smash burgers: hot, fast, and they put the prep counter to work for buns and toppings. Breakfast burritos and cheeseburger burritos make good second cooks.
Save the pin so the cut list, the cost table and the clearance rules are one tap away on build day.
More for the Griddle Cook
Griddle care, choosing a cooker, a fall pancake for the flat top, menus to host, and an indoor option.
Will a Blackstone Griddle Rust?
Keep the cooktop seasoned all year. Read the guide → ChoosingGriddle Versus Grill
Which one suits your cooking. Compare them → Griddle BreakfastPumpkin Pie Pancakes
A fall stack for the flat top. See the recipe → HostingDinner Party Ideas
Menus for the new setup. See the ideas → OutdoorsPicnic Food Ideas
Make-ahead food for the yard. See the ideas → IndoorsBest Commercial Electric Griddle
For kitchens with no patio. See the picks →Cedar counter on one side, griddle on its own cart on the other, 36 inches of open air between them, and two weekends of work.
Pin this DIY Blackstone grill station plan for your next weekend build.
